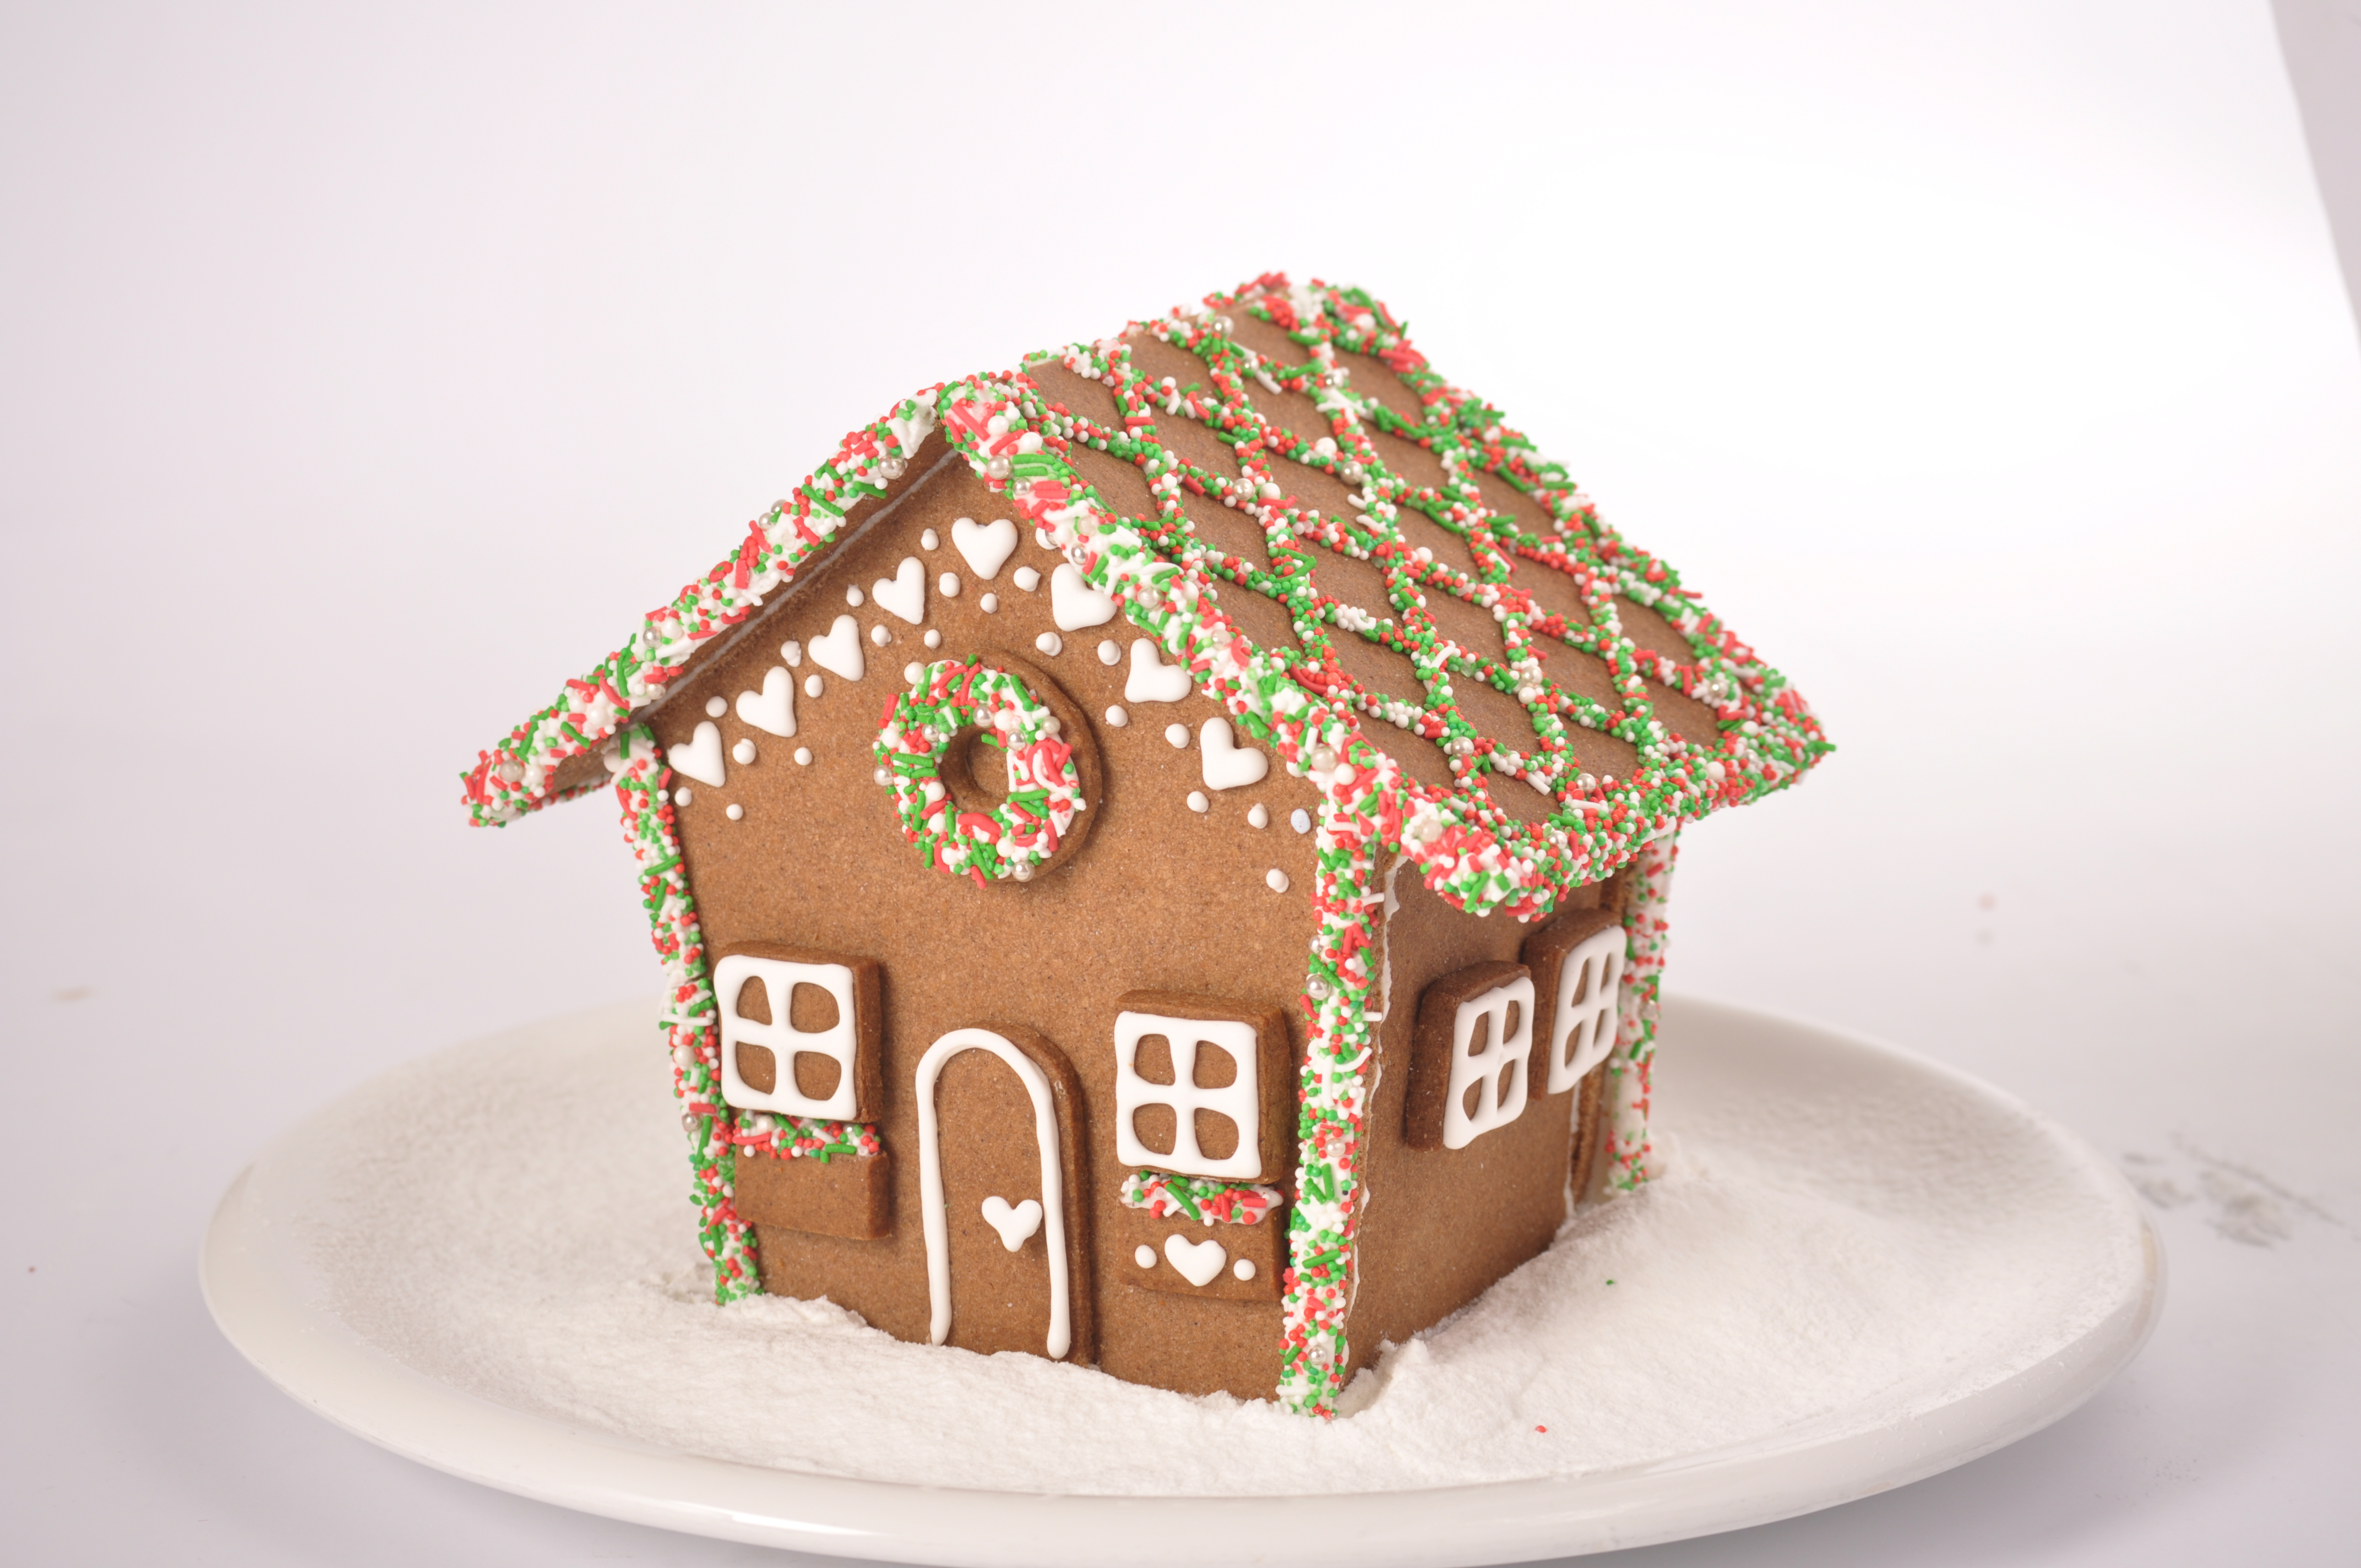
Gingerbread House - Made with our Gingerbread Decorating Kit
Posted by Roberts Edible Craft on 1st Sep 2025
With Christmas fast approaching, and restrictions still in place in a significant amount of locations, what better time to enjoy some Christmas Baking. These step by step assembly photos are to accompany our Gingerbread Decorating Kit. (available through Spotlight Stores)
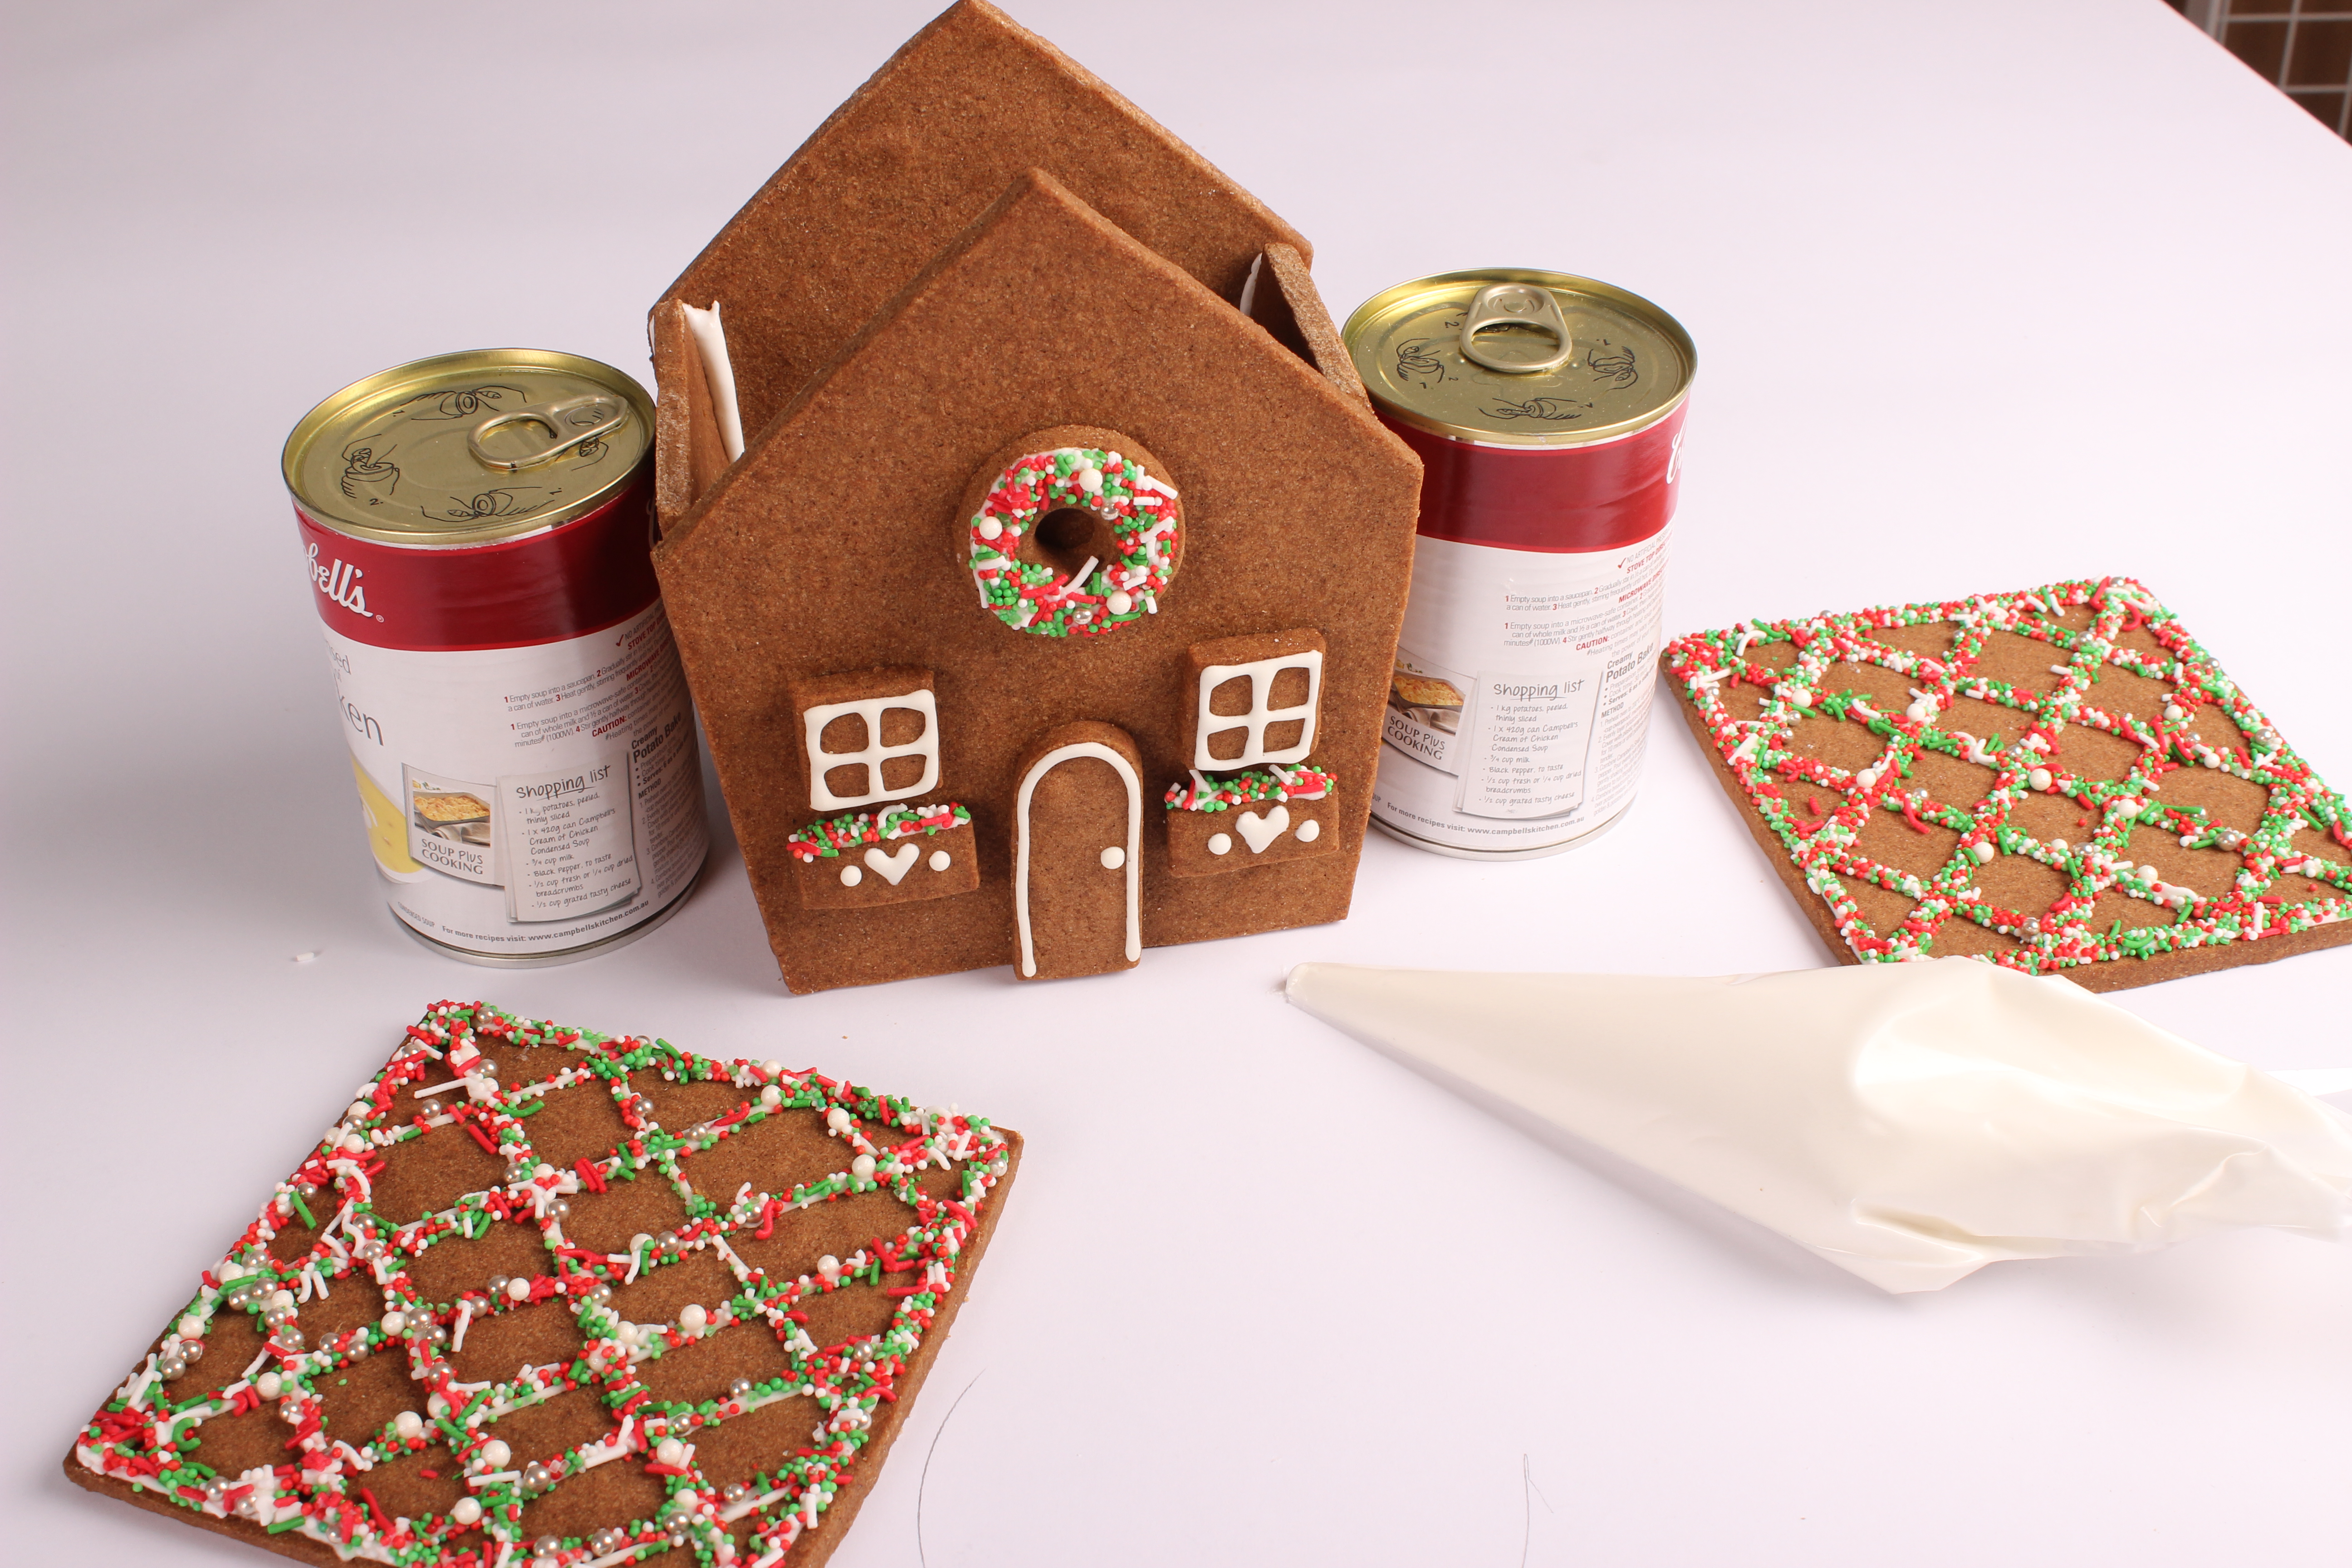
- Take 1 Front/Back shape, laying it flat, and pipe icing along the vertical sides (not the roof). Stand the piece upright, using a can or similar, to hold it in place.
- Take 1 Side Wall shape and attach the long side to the left-hand side piped icing.
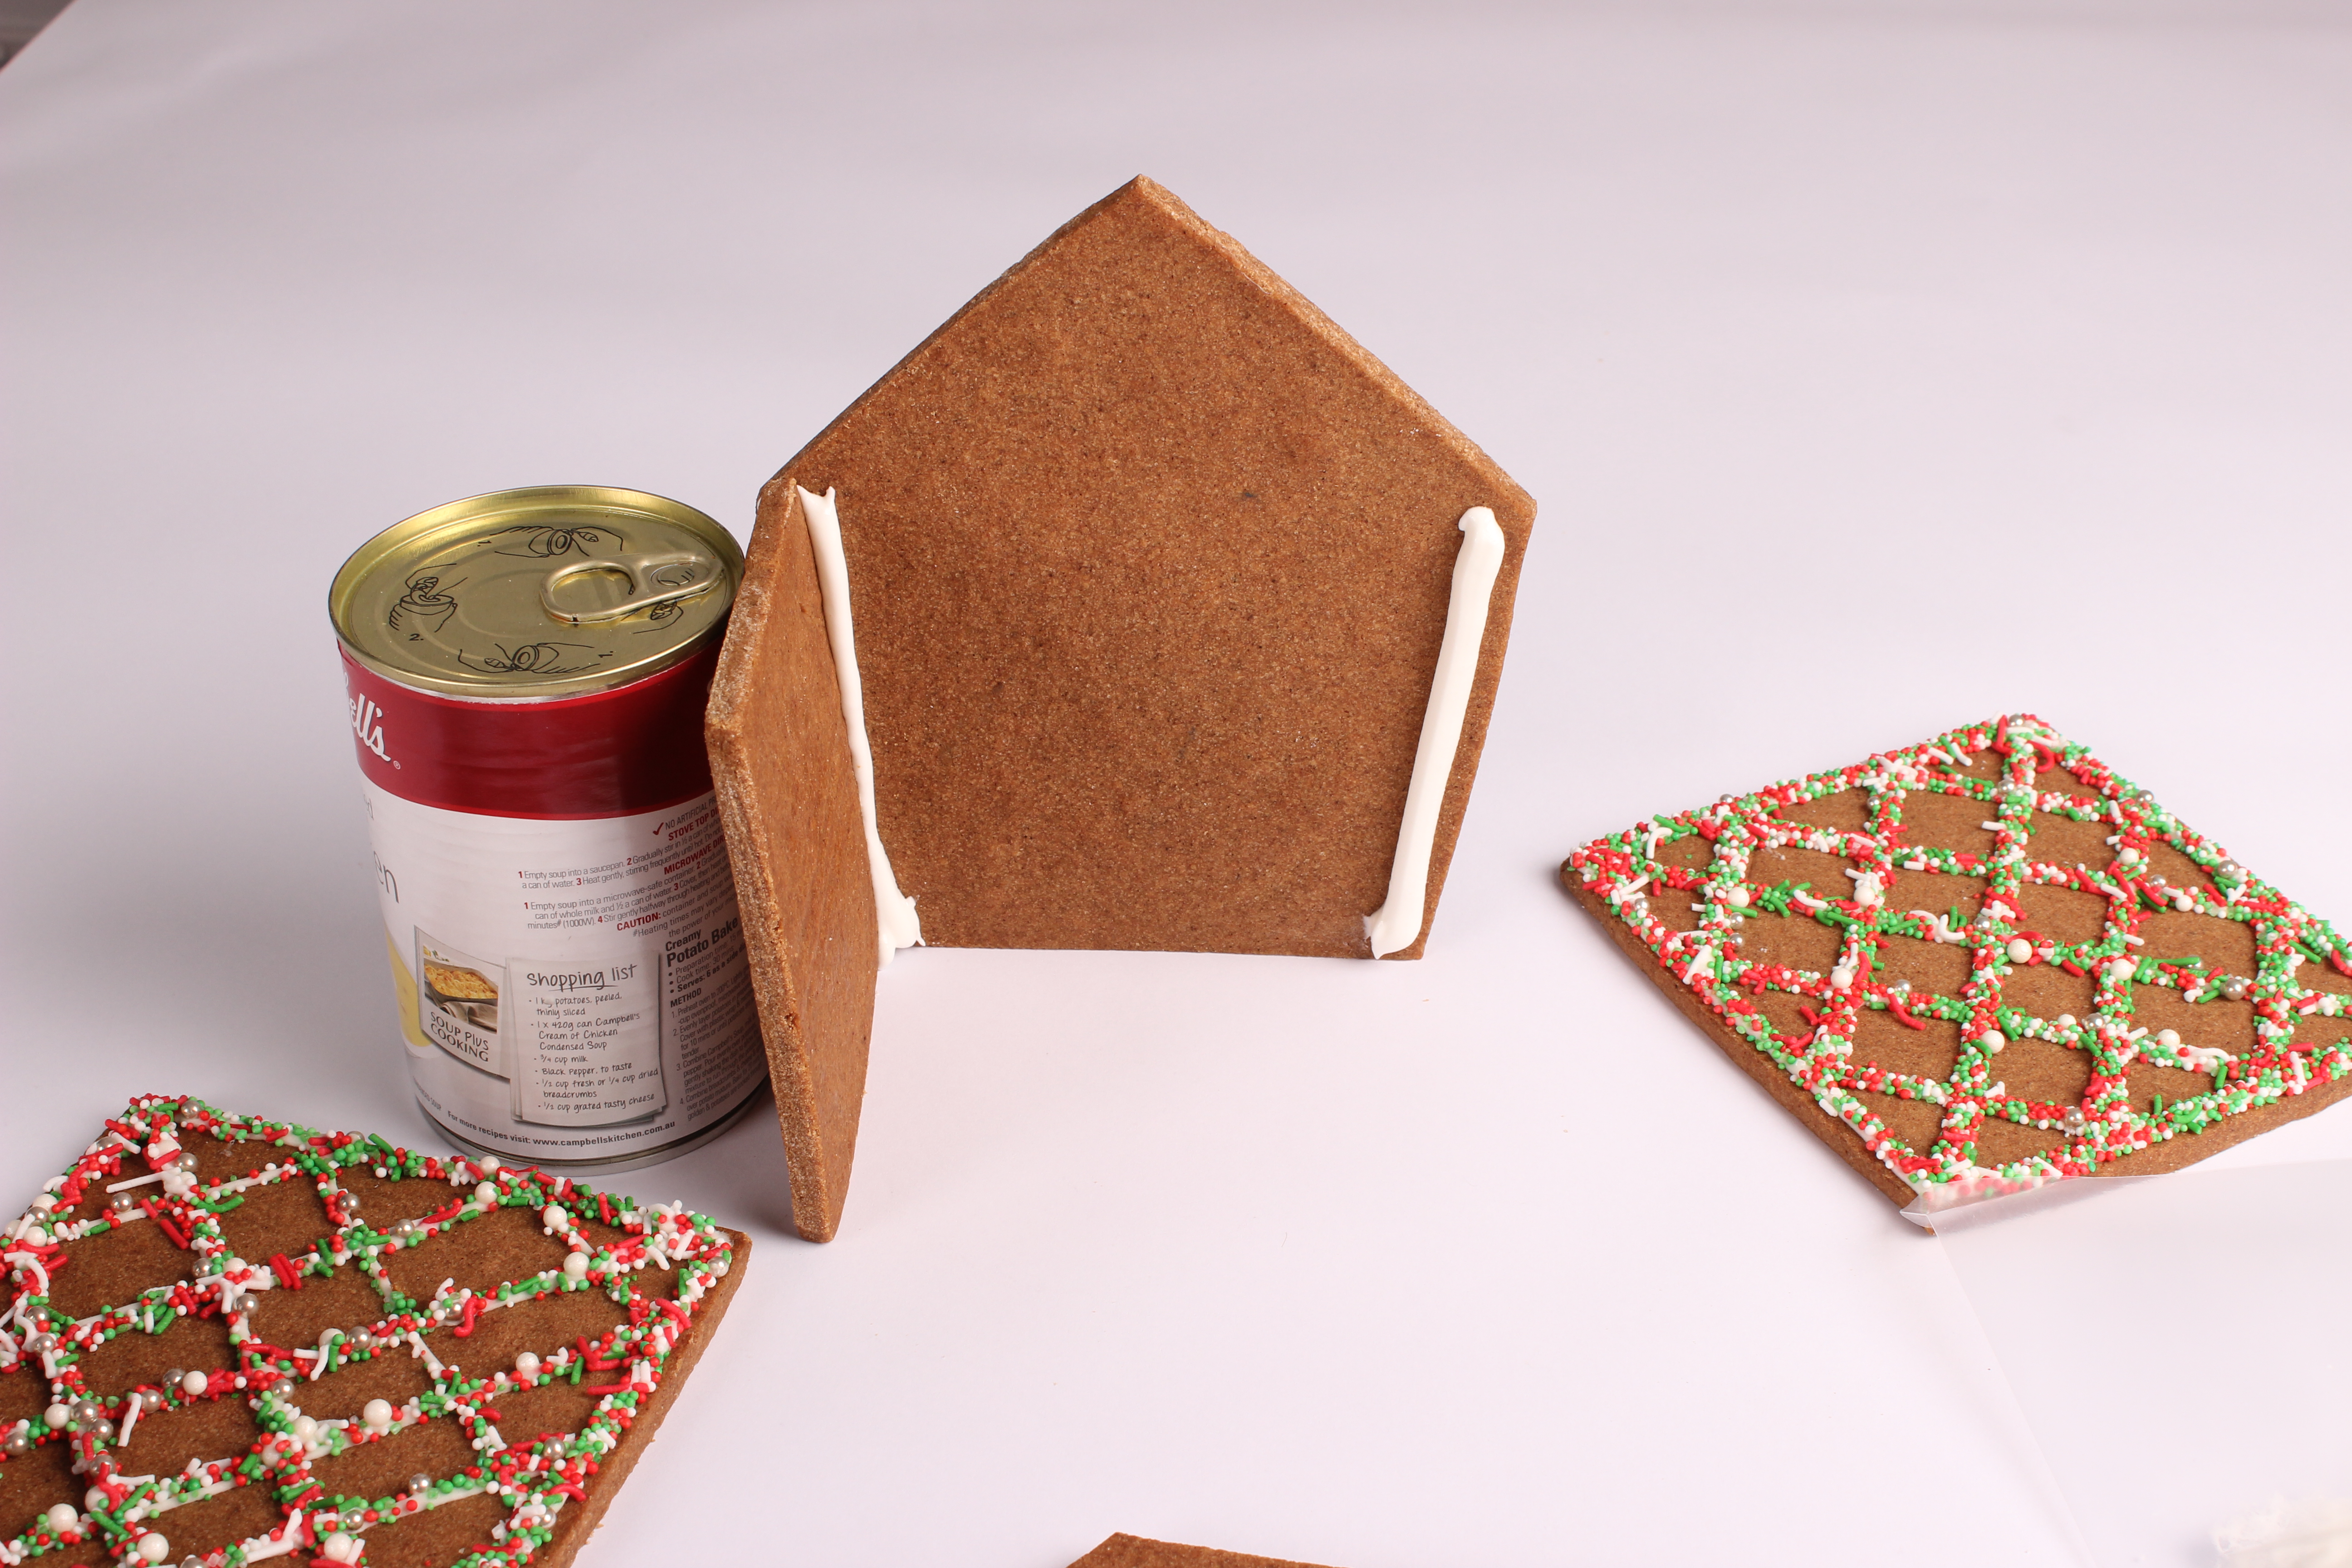
- Take the remaining piece of the Side Walls shape and attach the long side to the right-hand side piped icing. Use another can to hold this side in place.
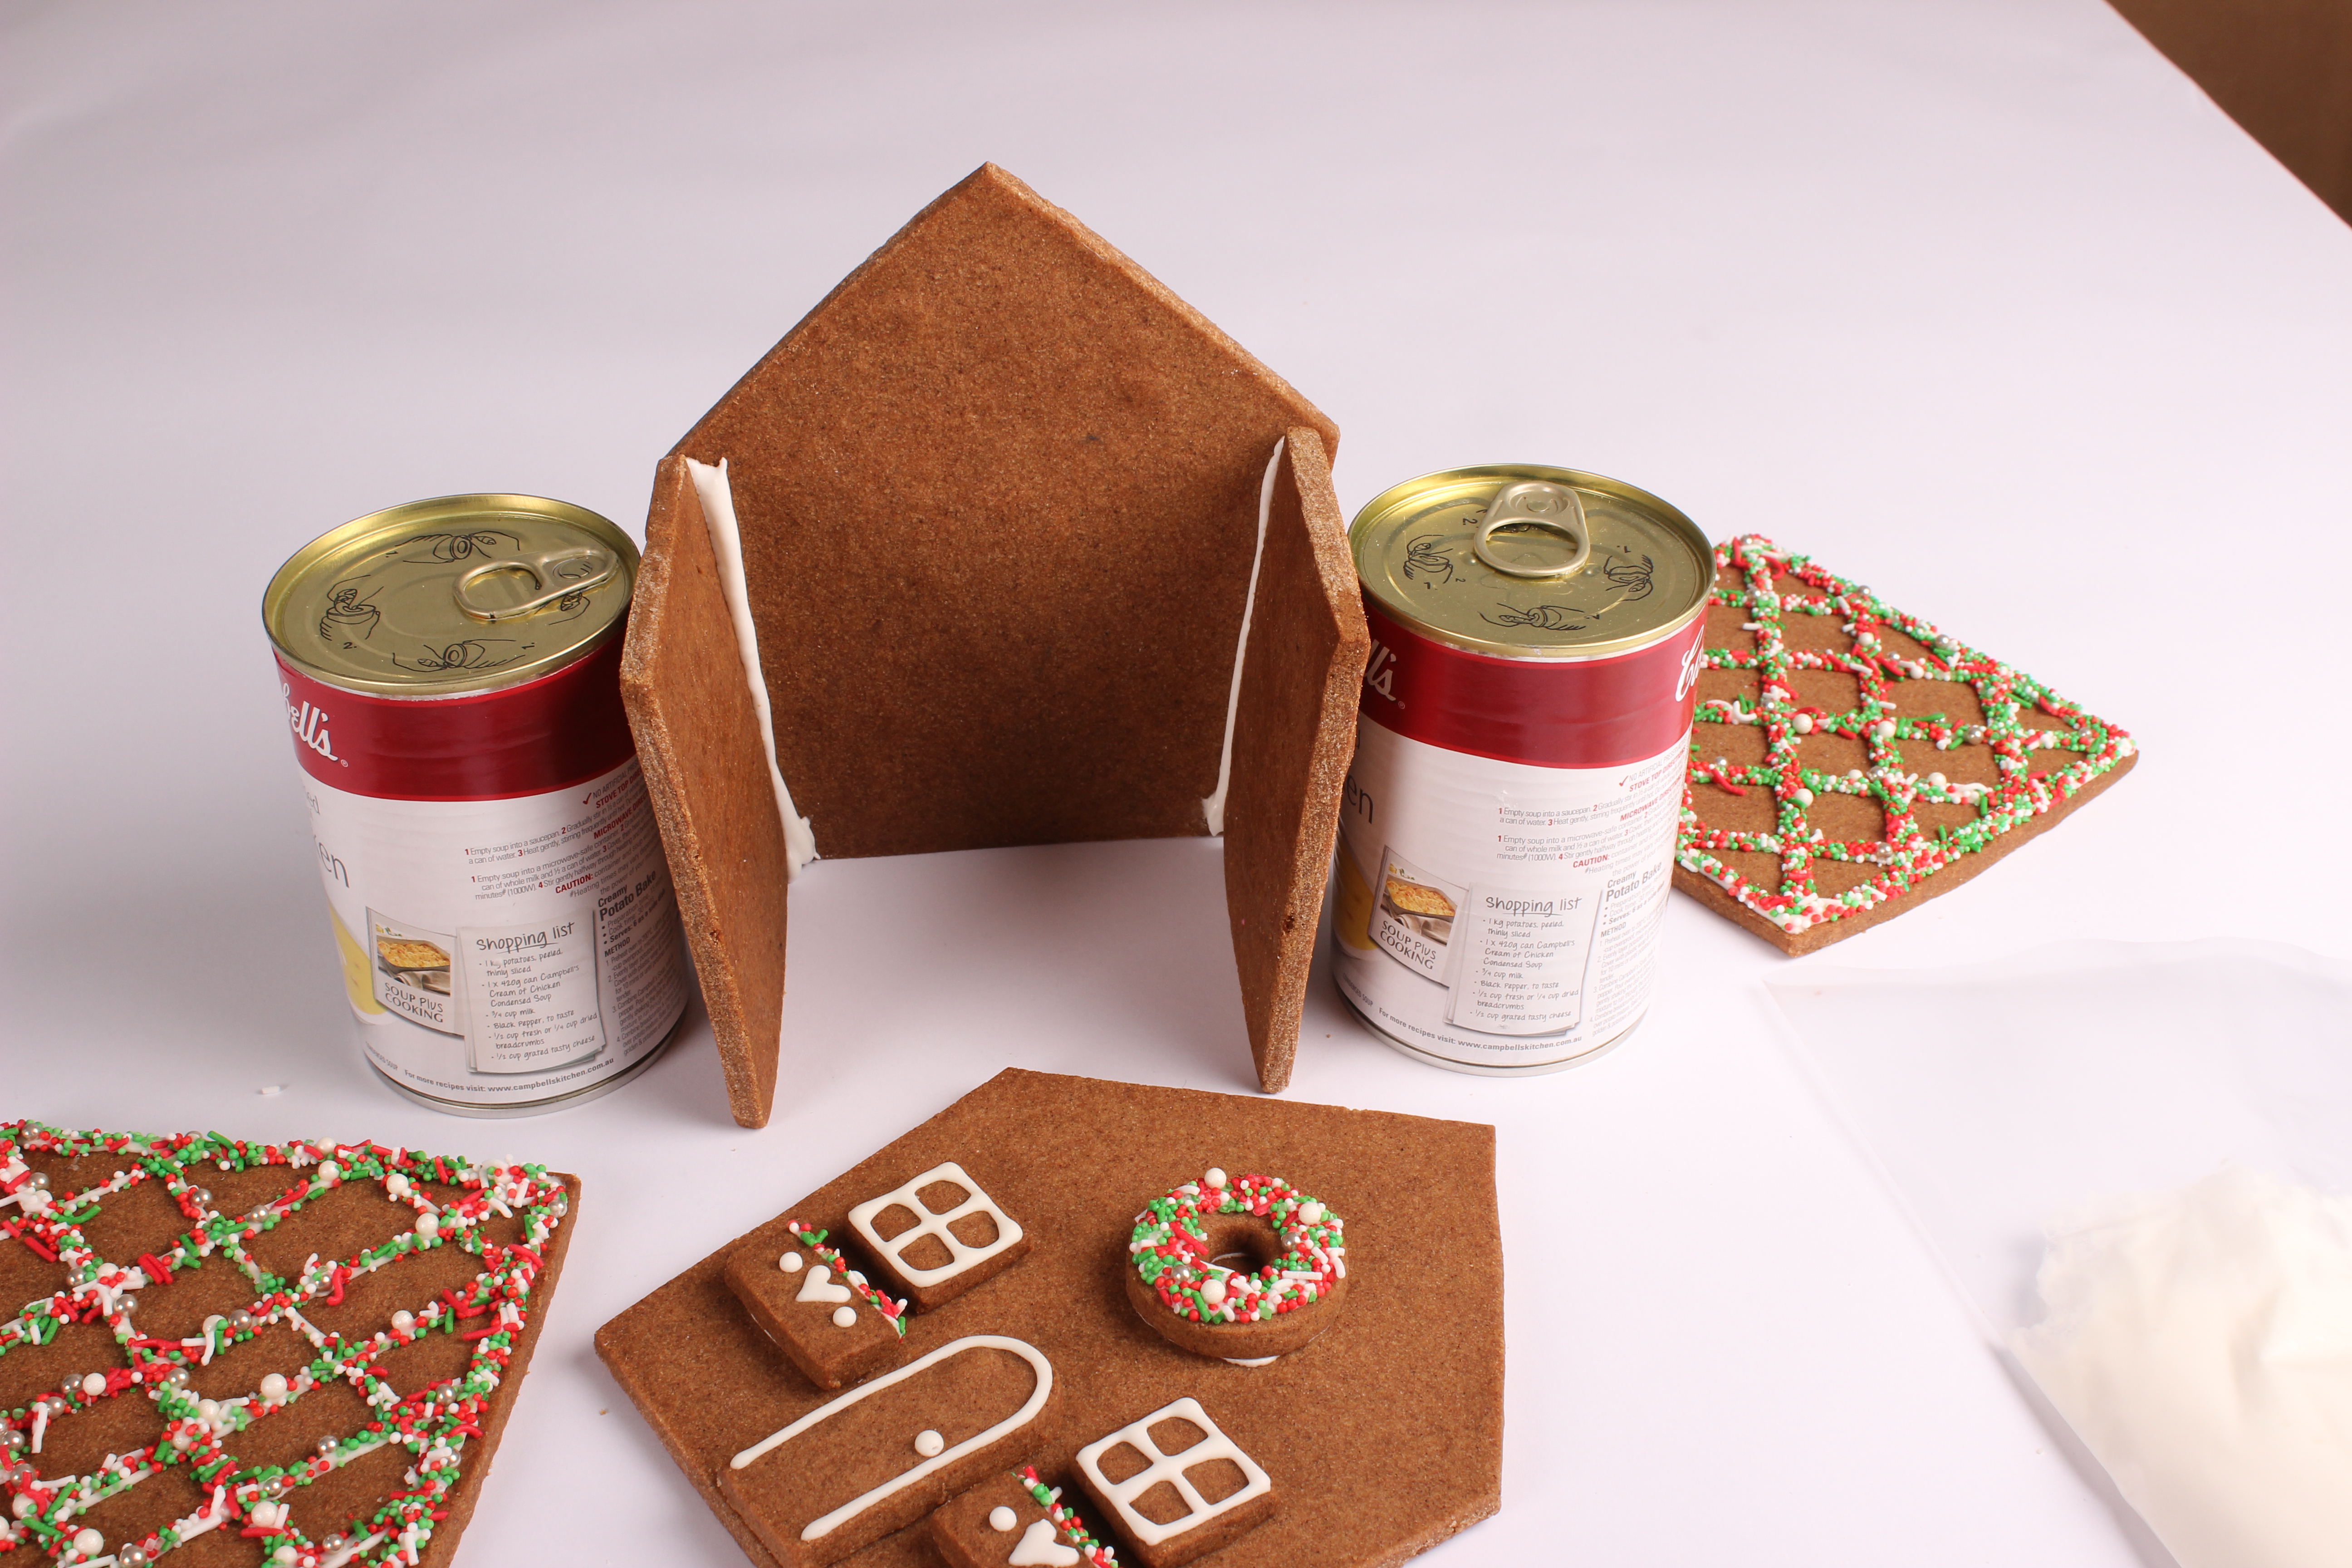
- Pipe a strip of icing along each of the exposed side edges of the left- and right-hand wall. Take the remaining 1 Piece of the Front/Back shape and move it into position to attach to the piped icing.
- Set aside for 2 - 3 hours to allow the icing to set firm. This will give your house stability before you attach the roof.
- Working from above, pipe a strip of icing around the left-hand exposed roof edges (front and back) and wall.
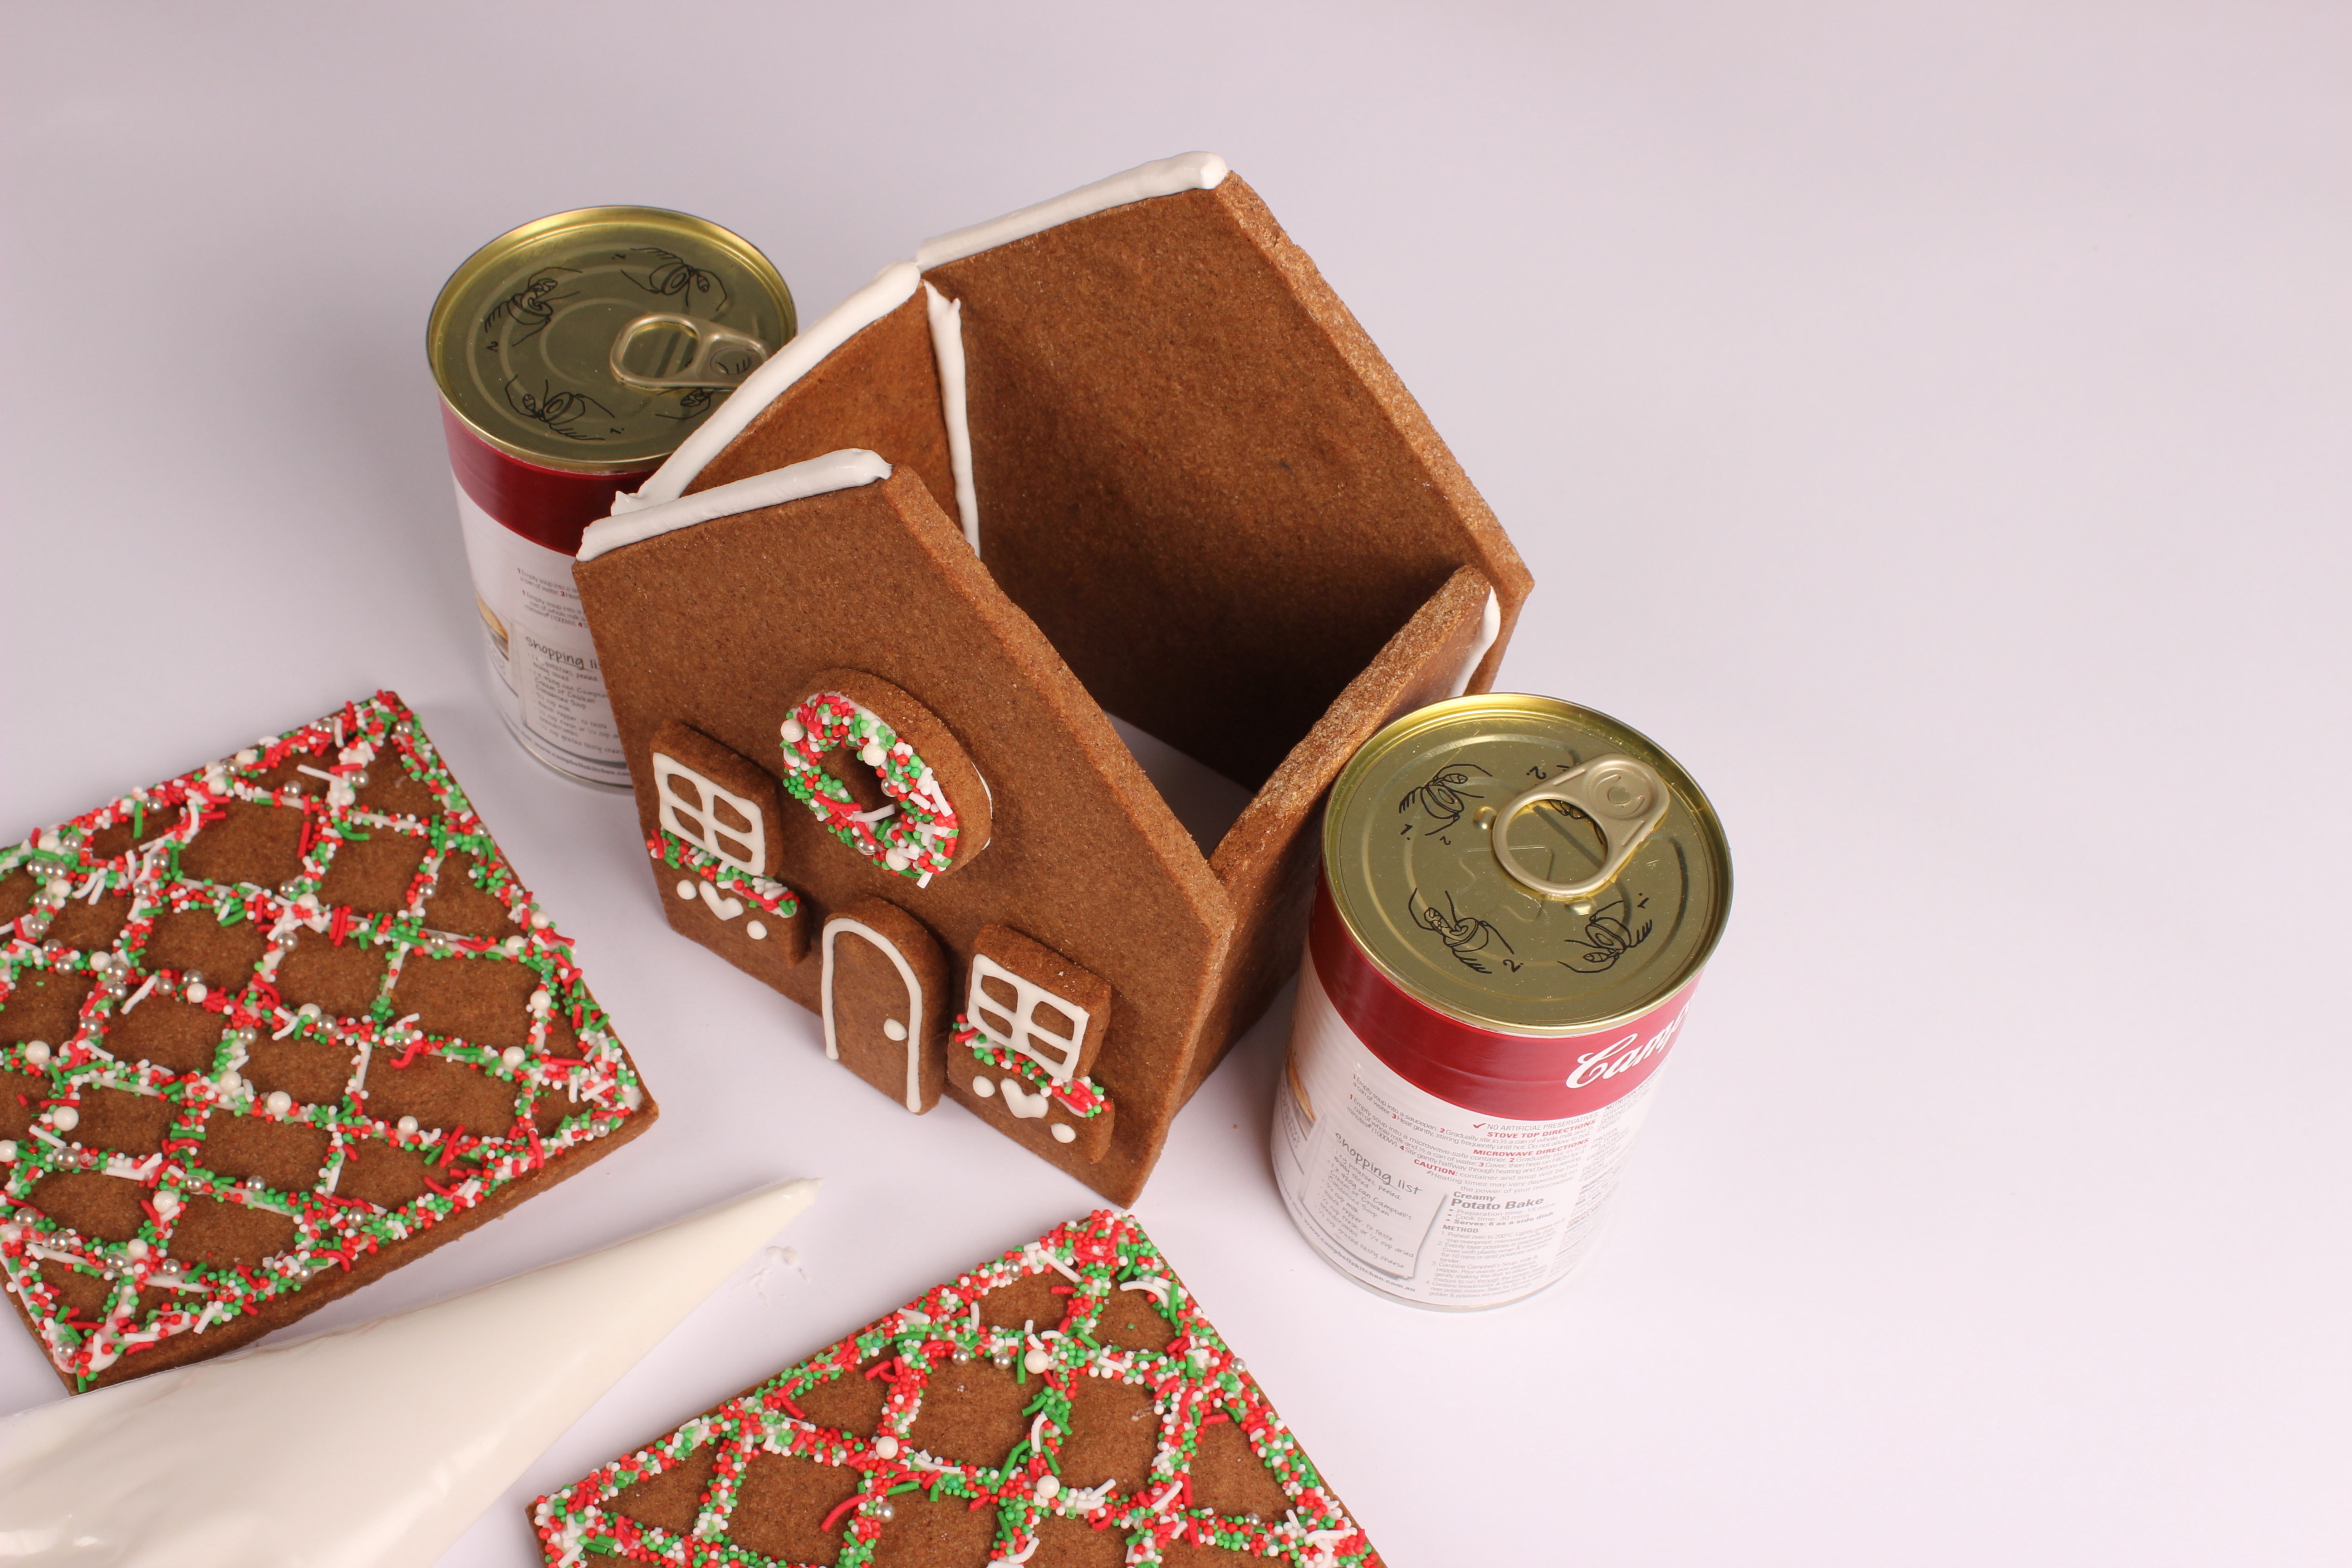
- Take 1 Piece of the Roof shape and place it into position. The shorter edge goes at the peak of the roof line.
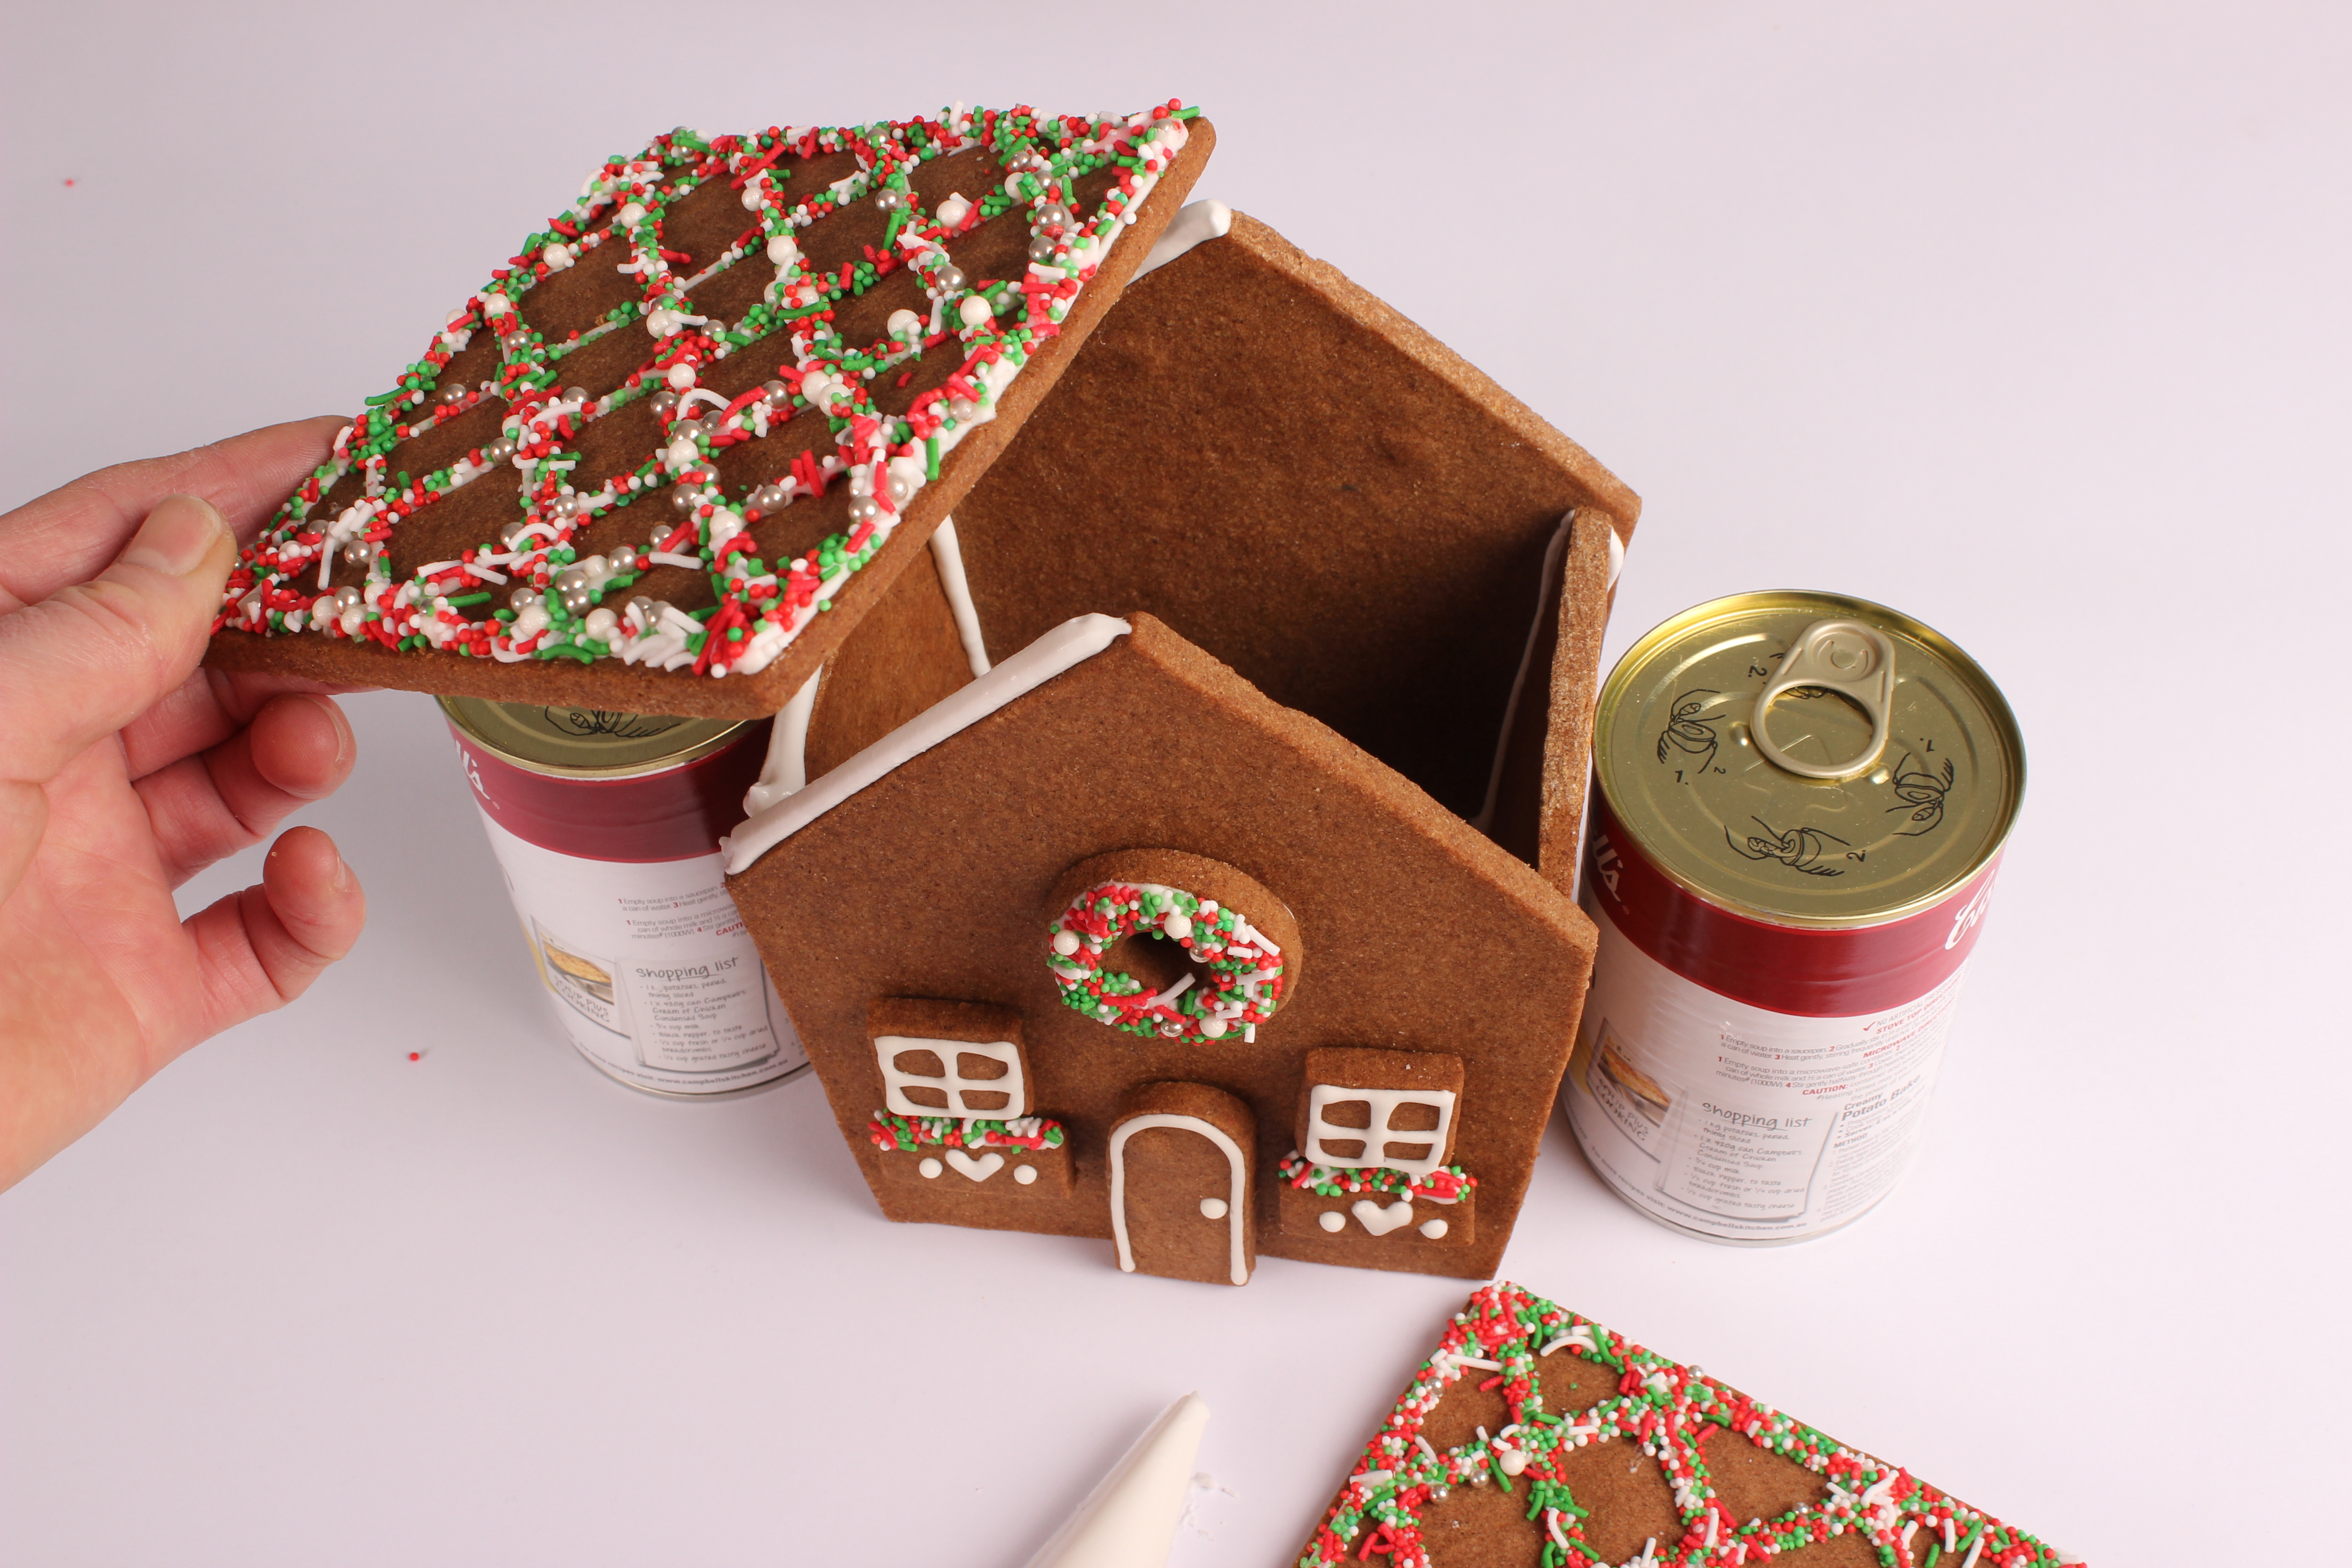
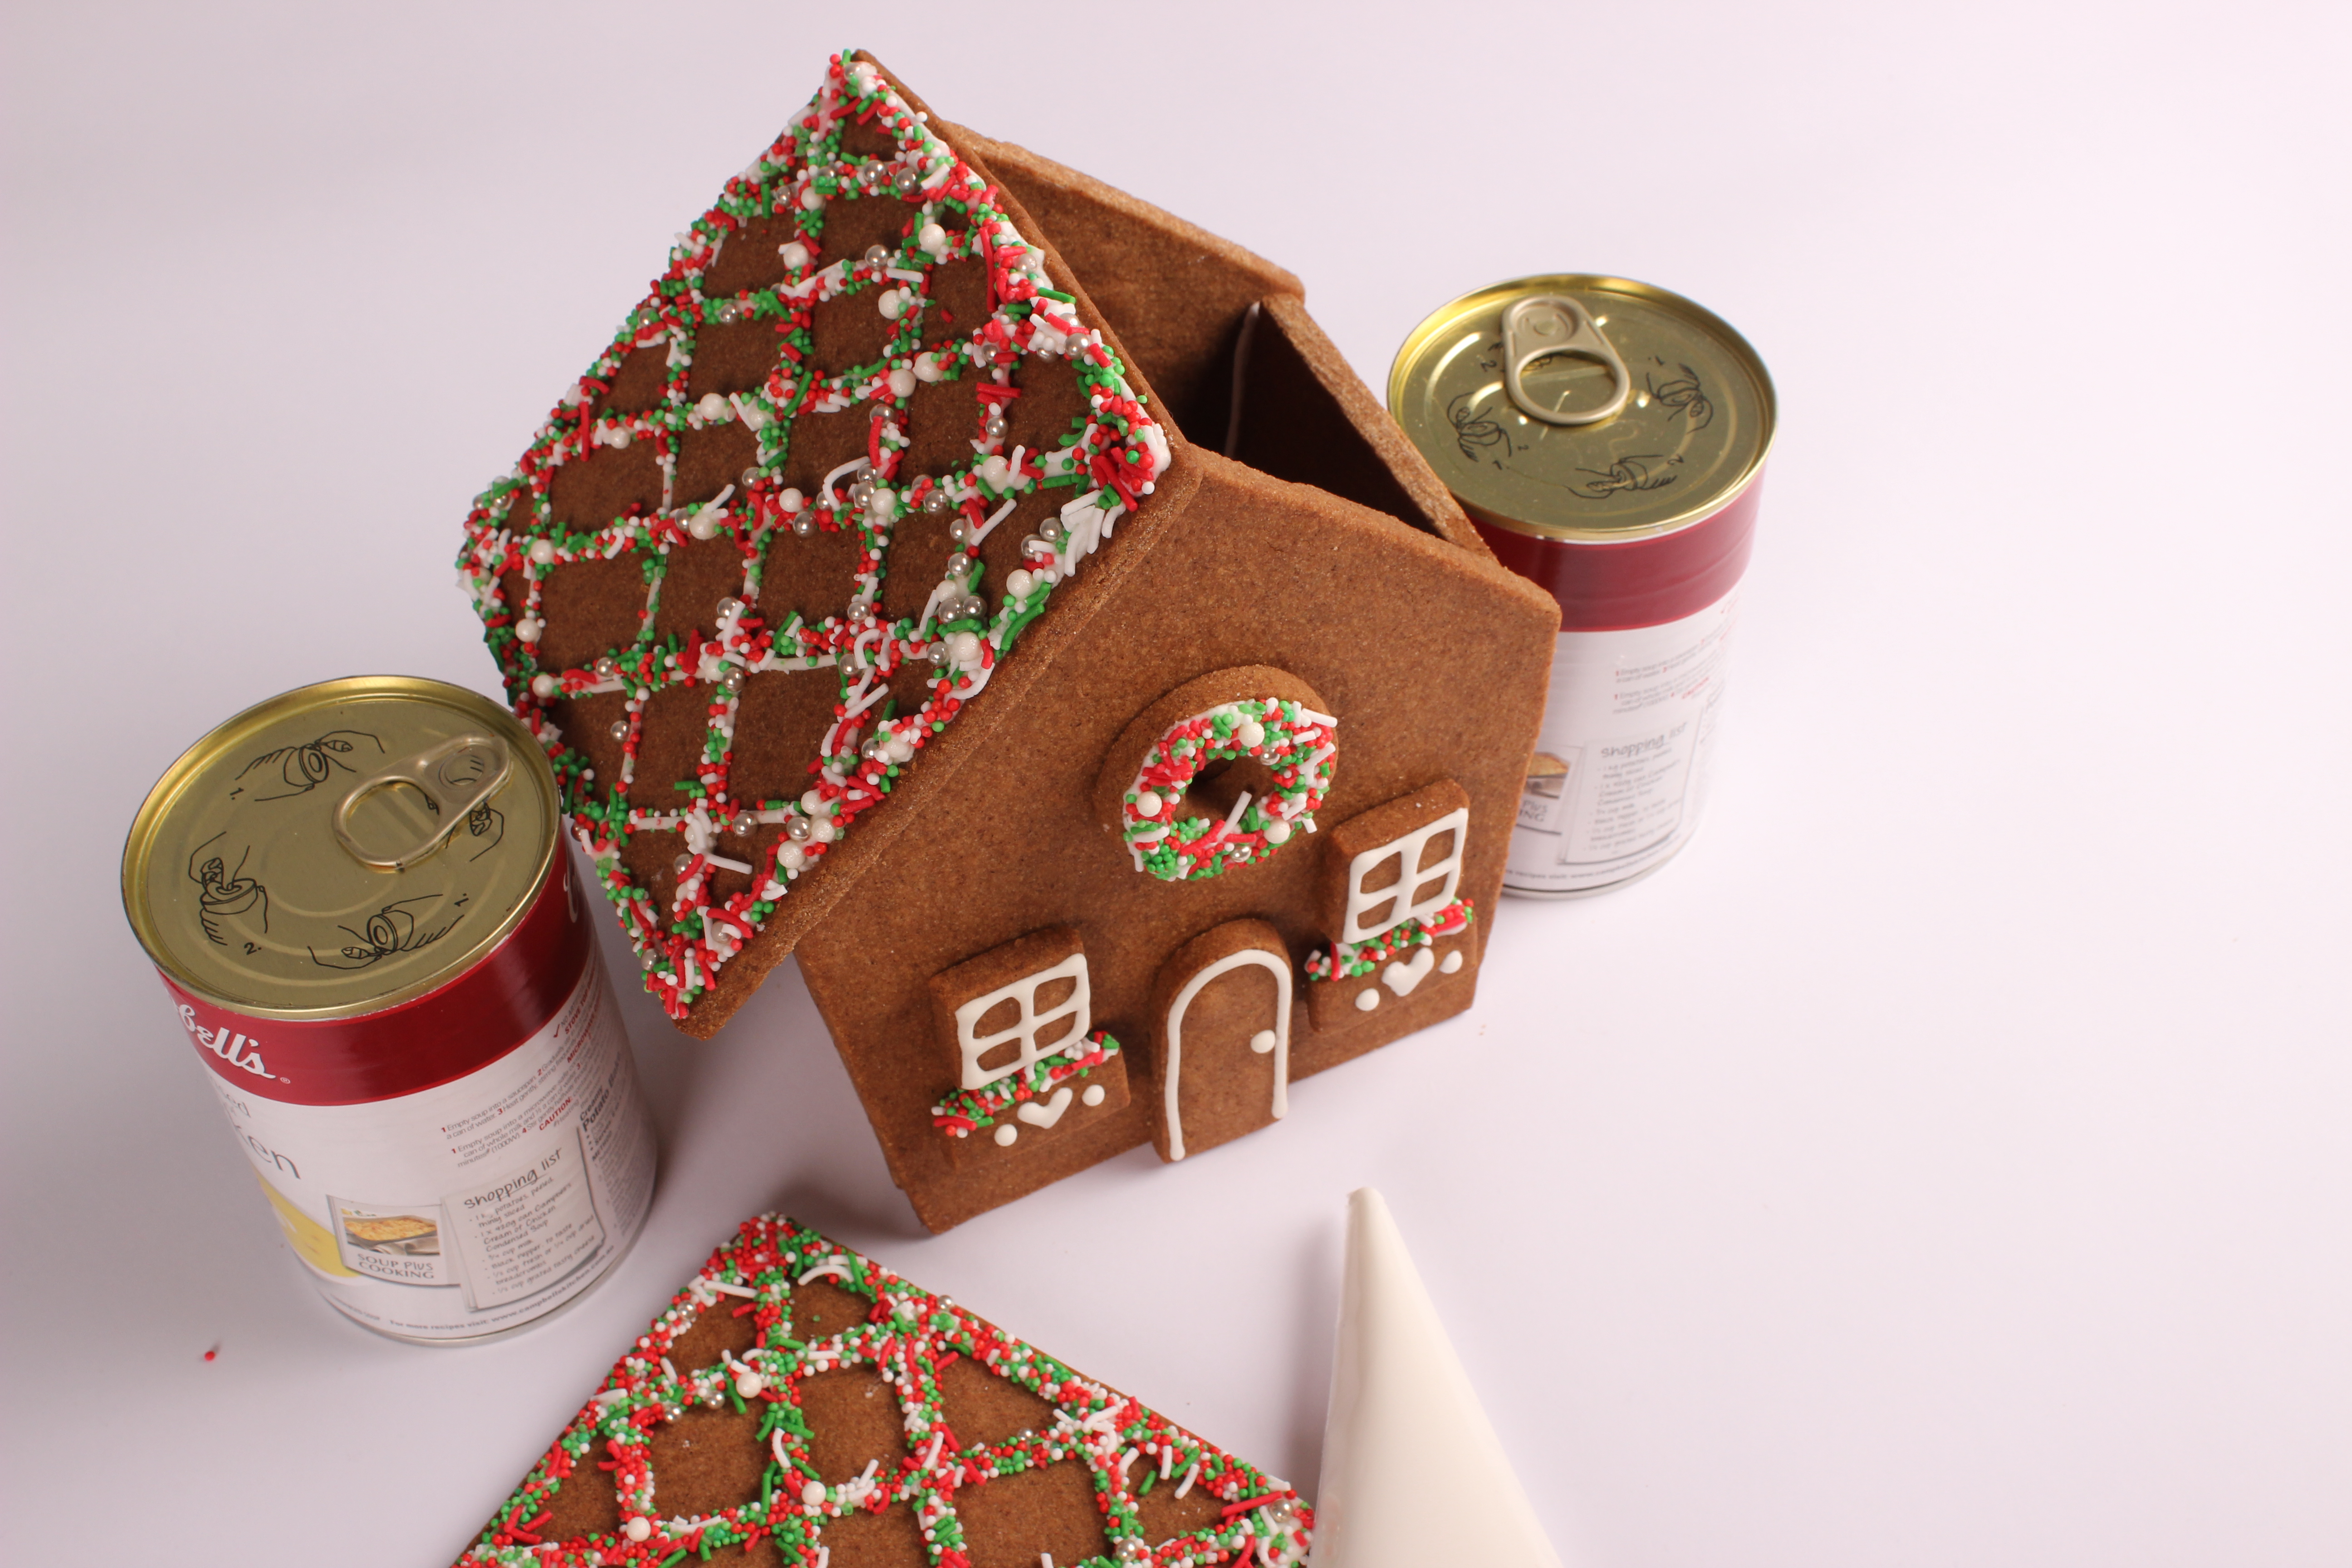
- Repeat these steps for the right-hand roof piece. Support the pieces until the icing begins to firm. For best results, leave to set and harden overnight.
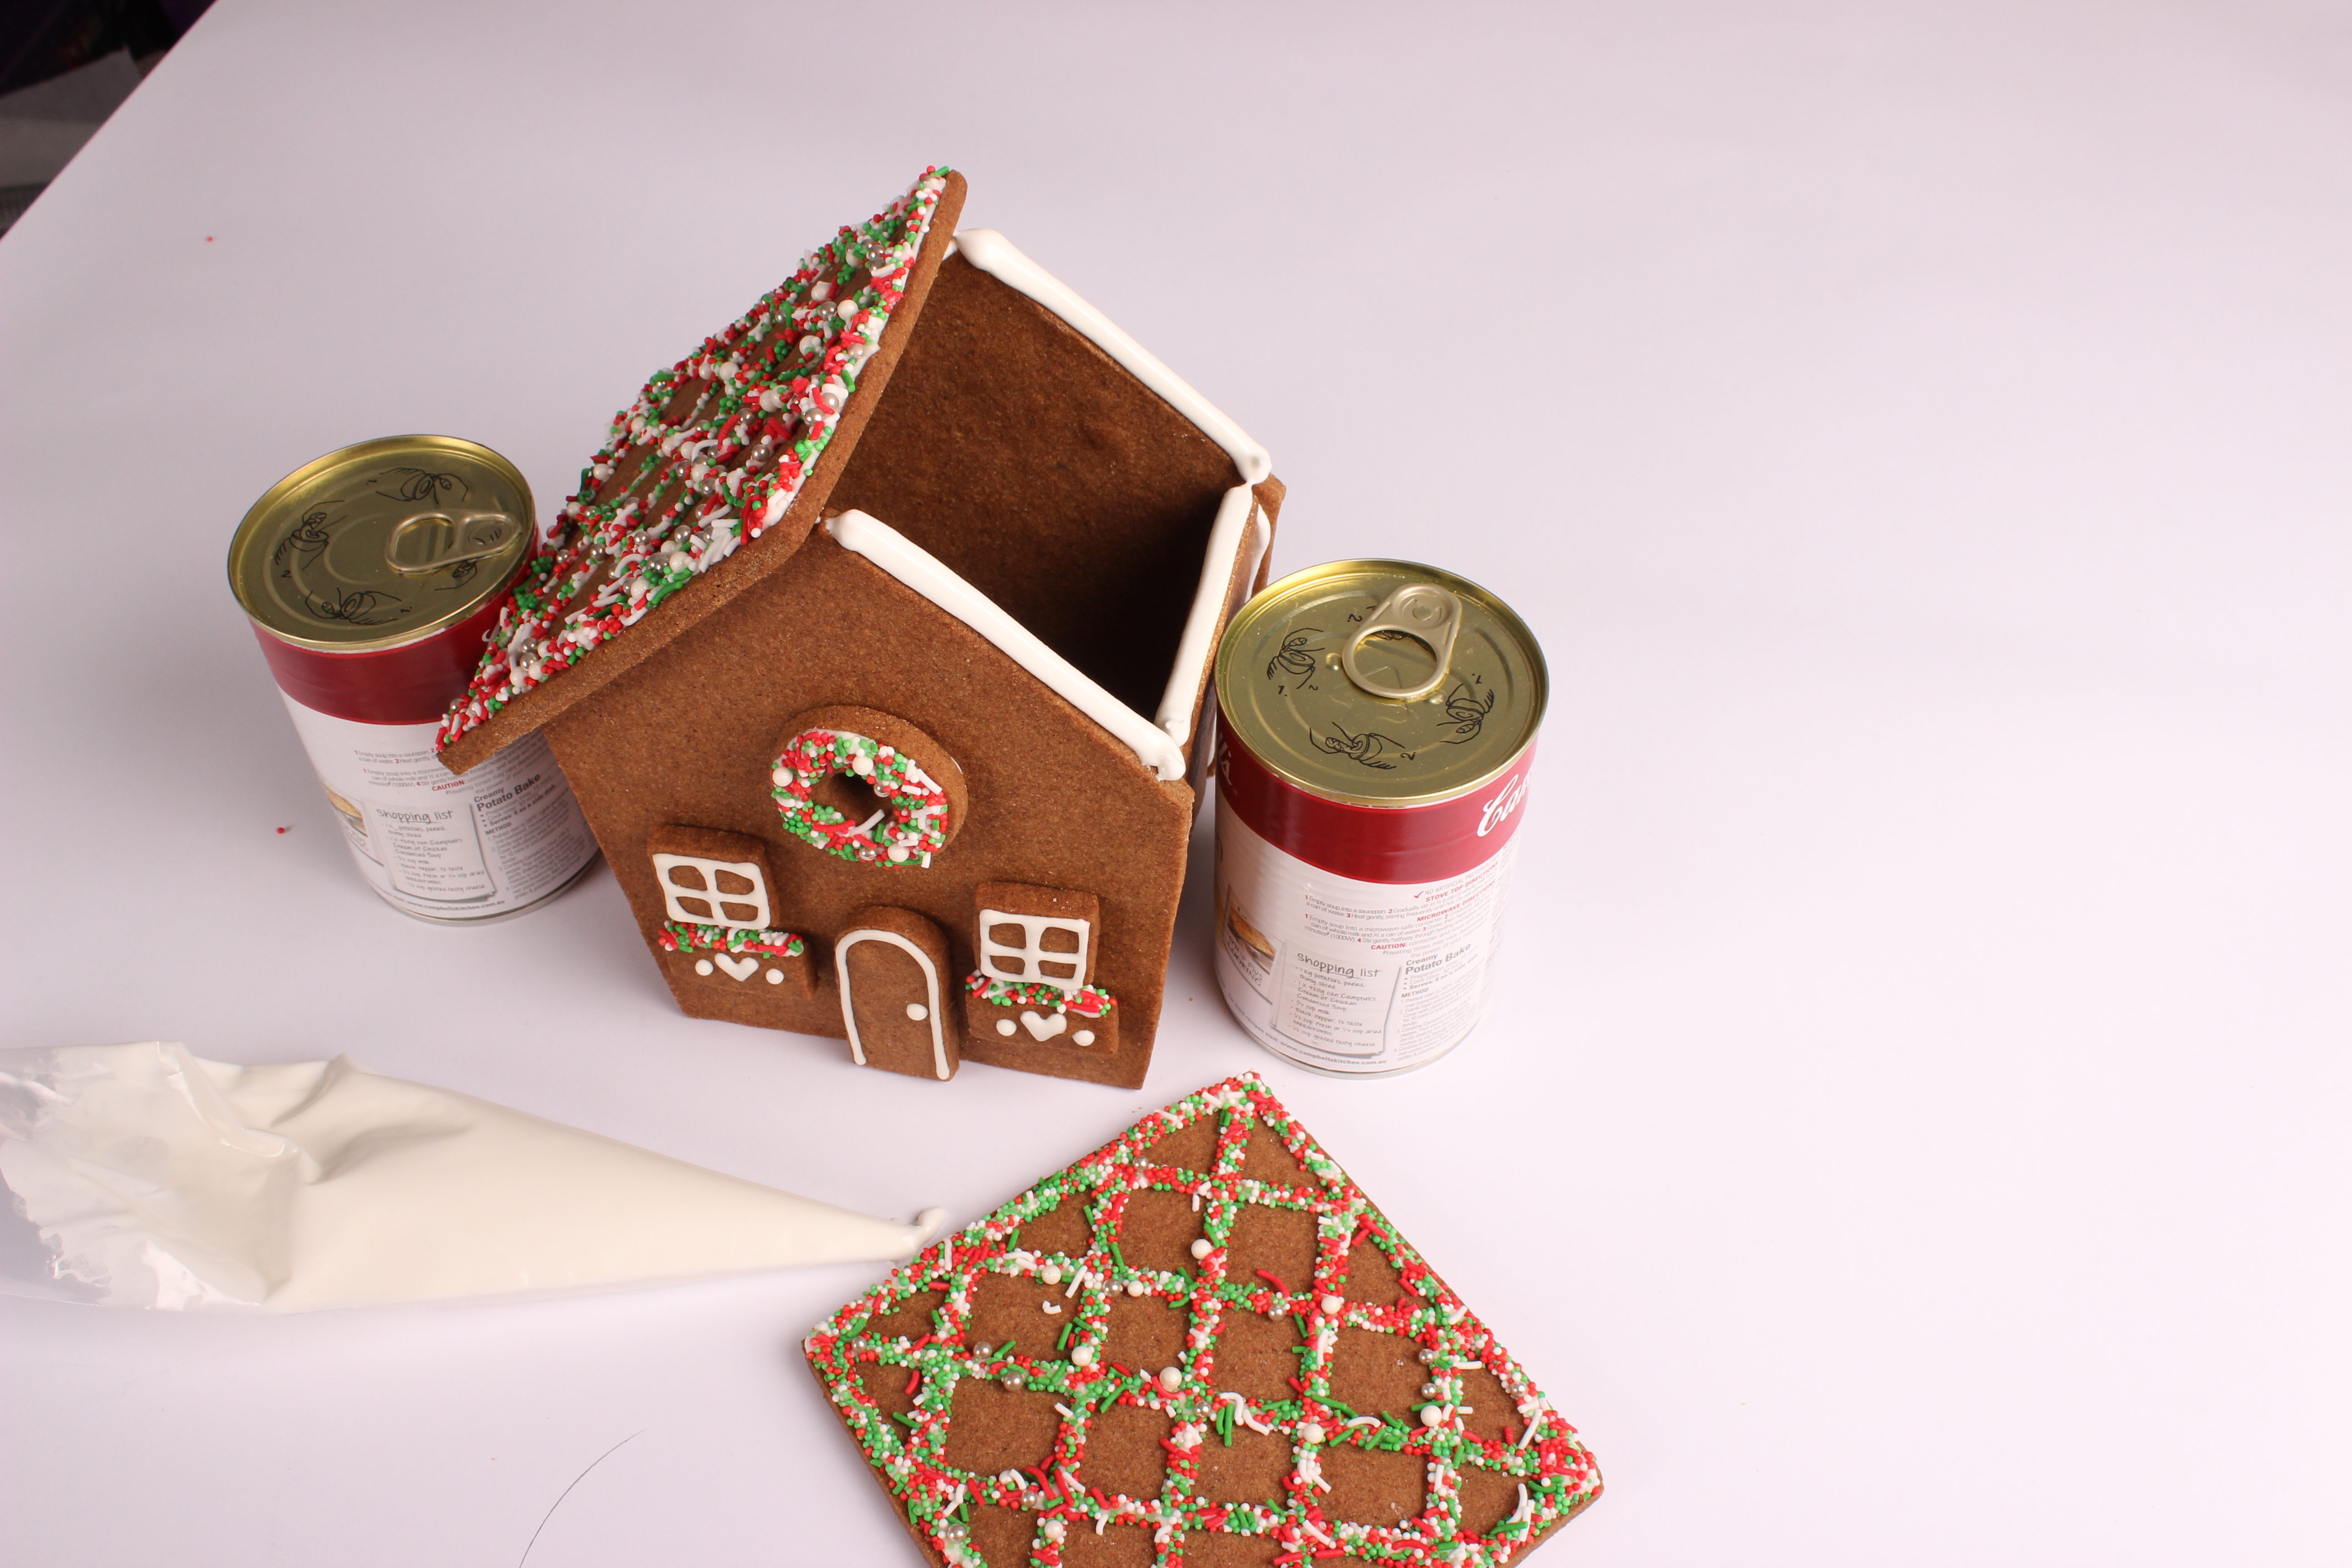
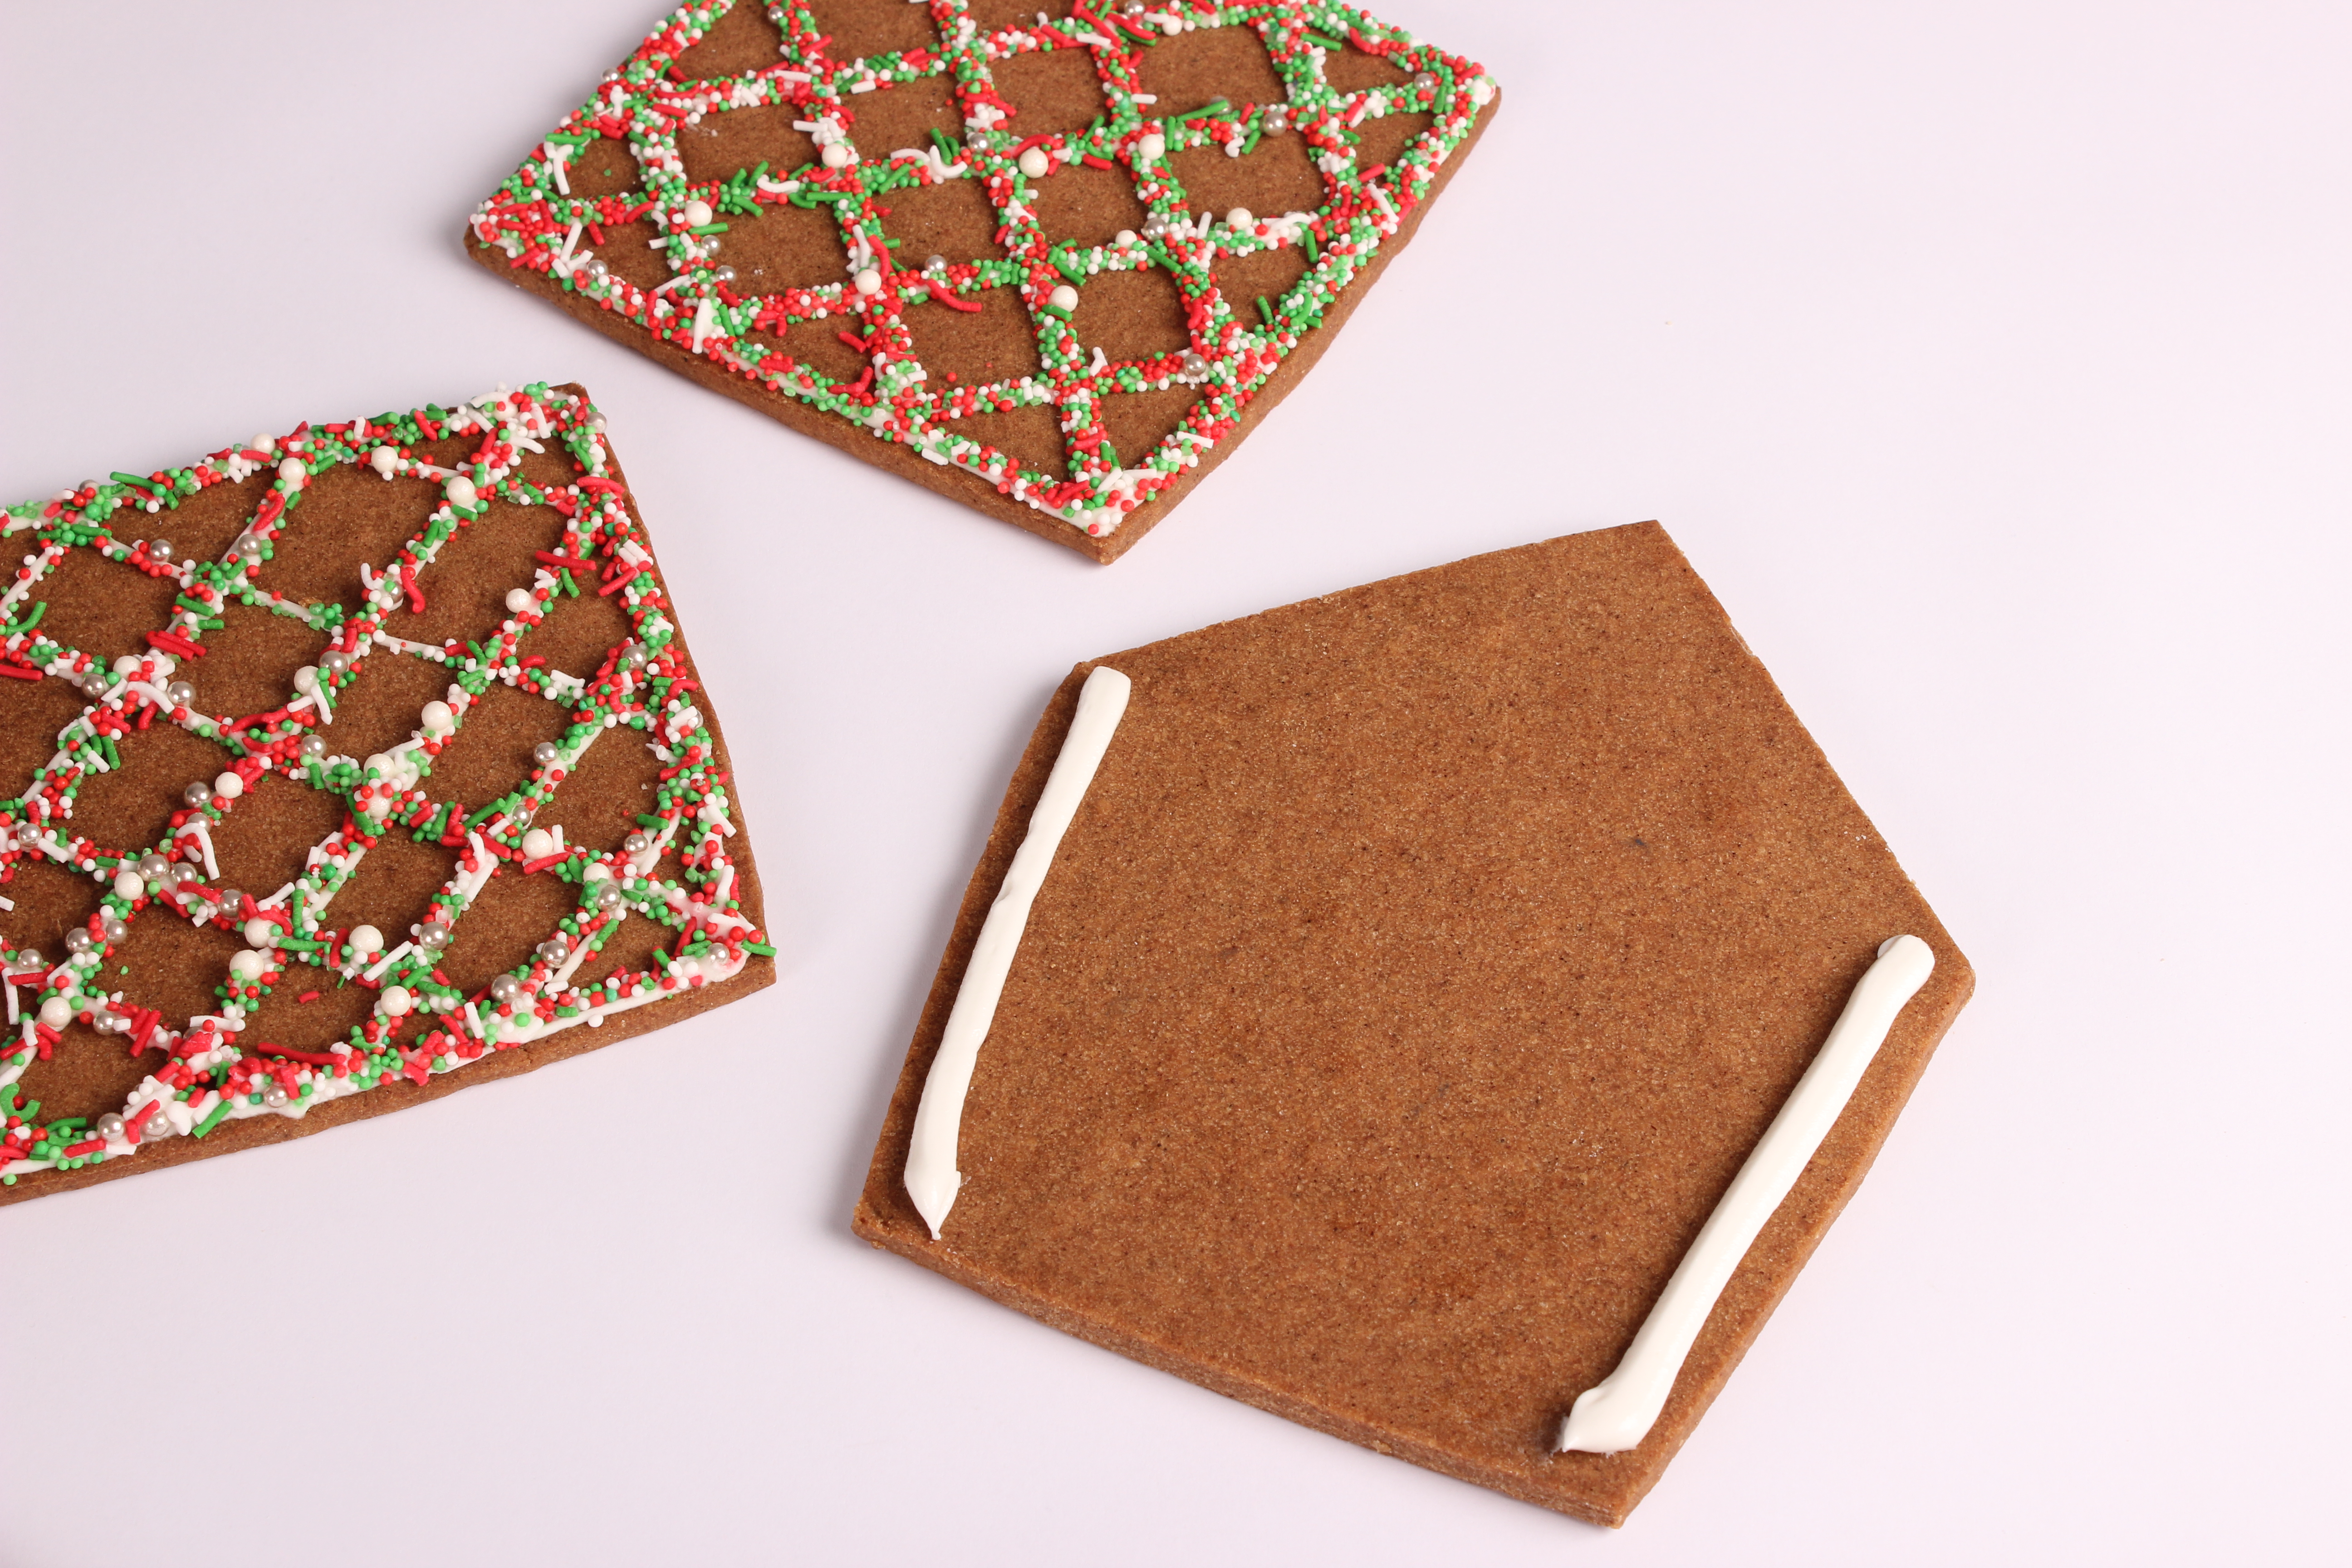
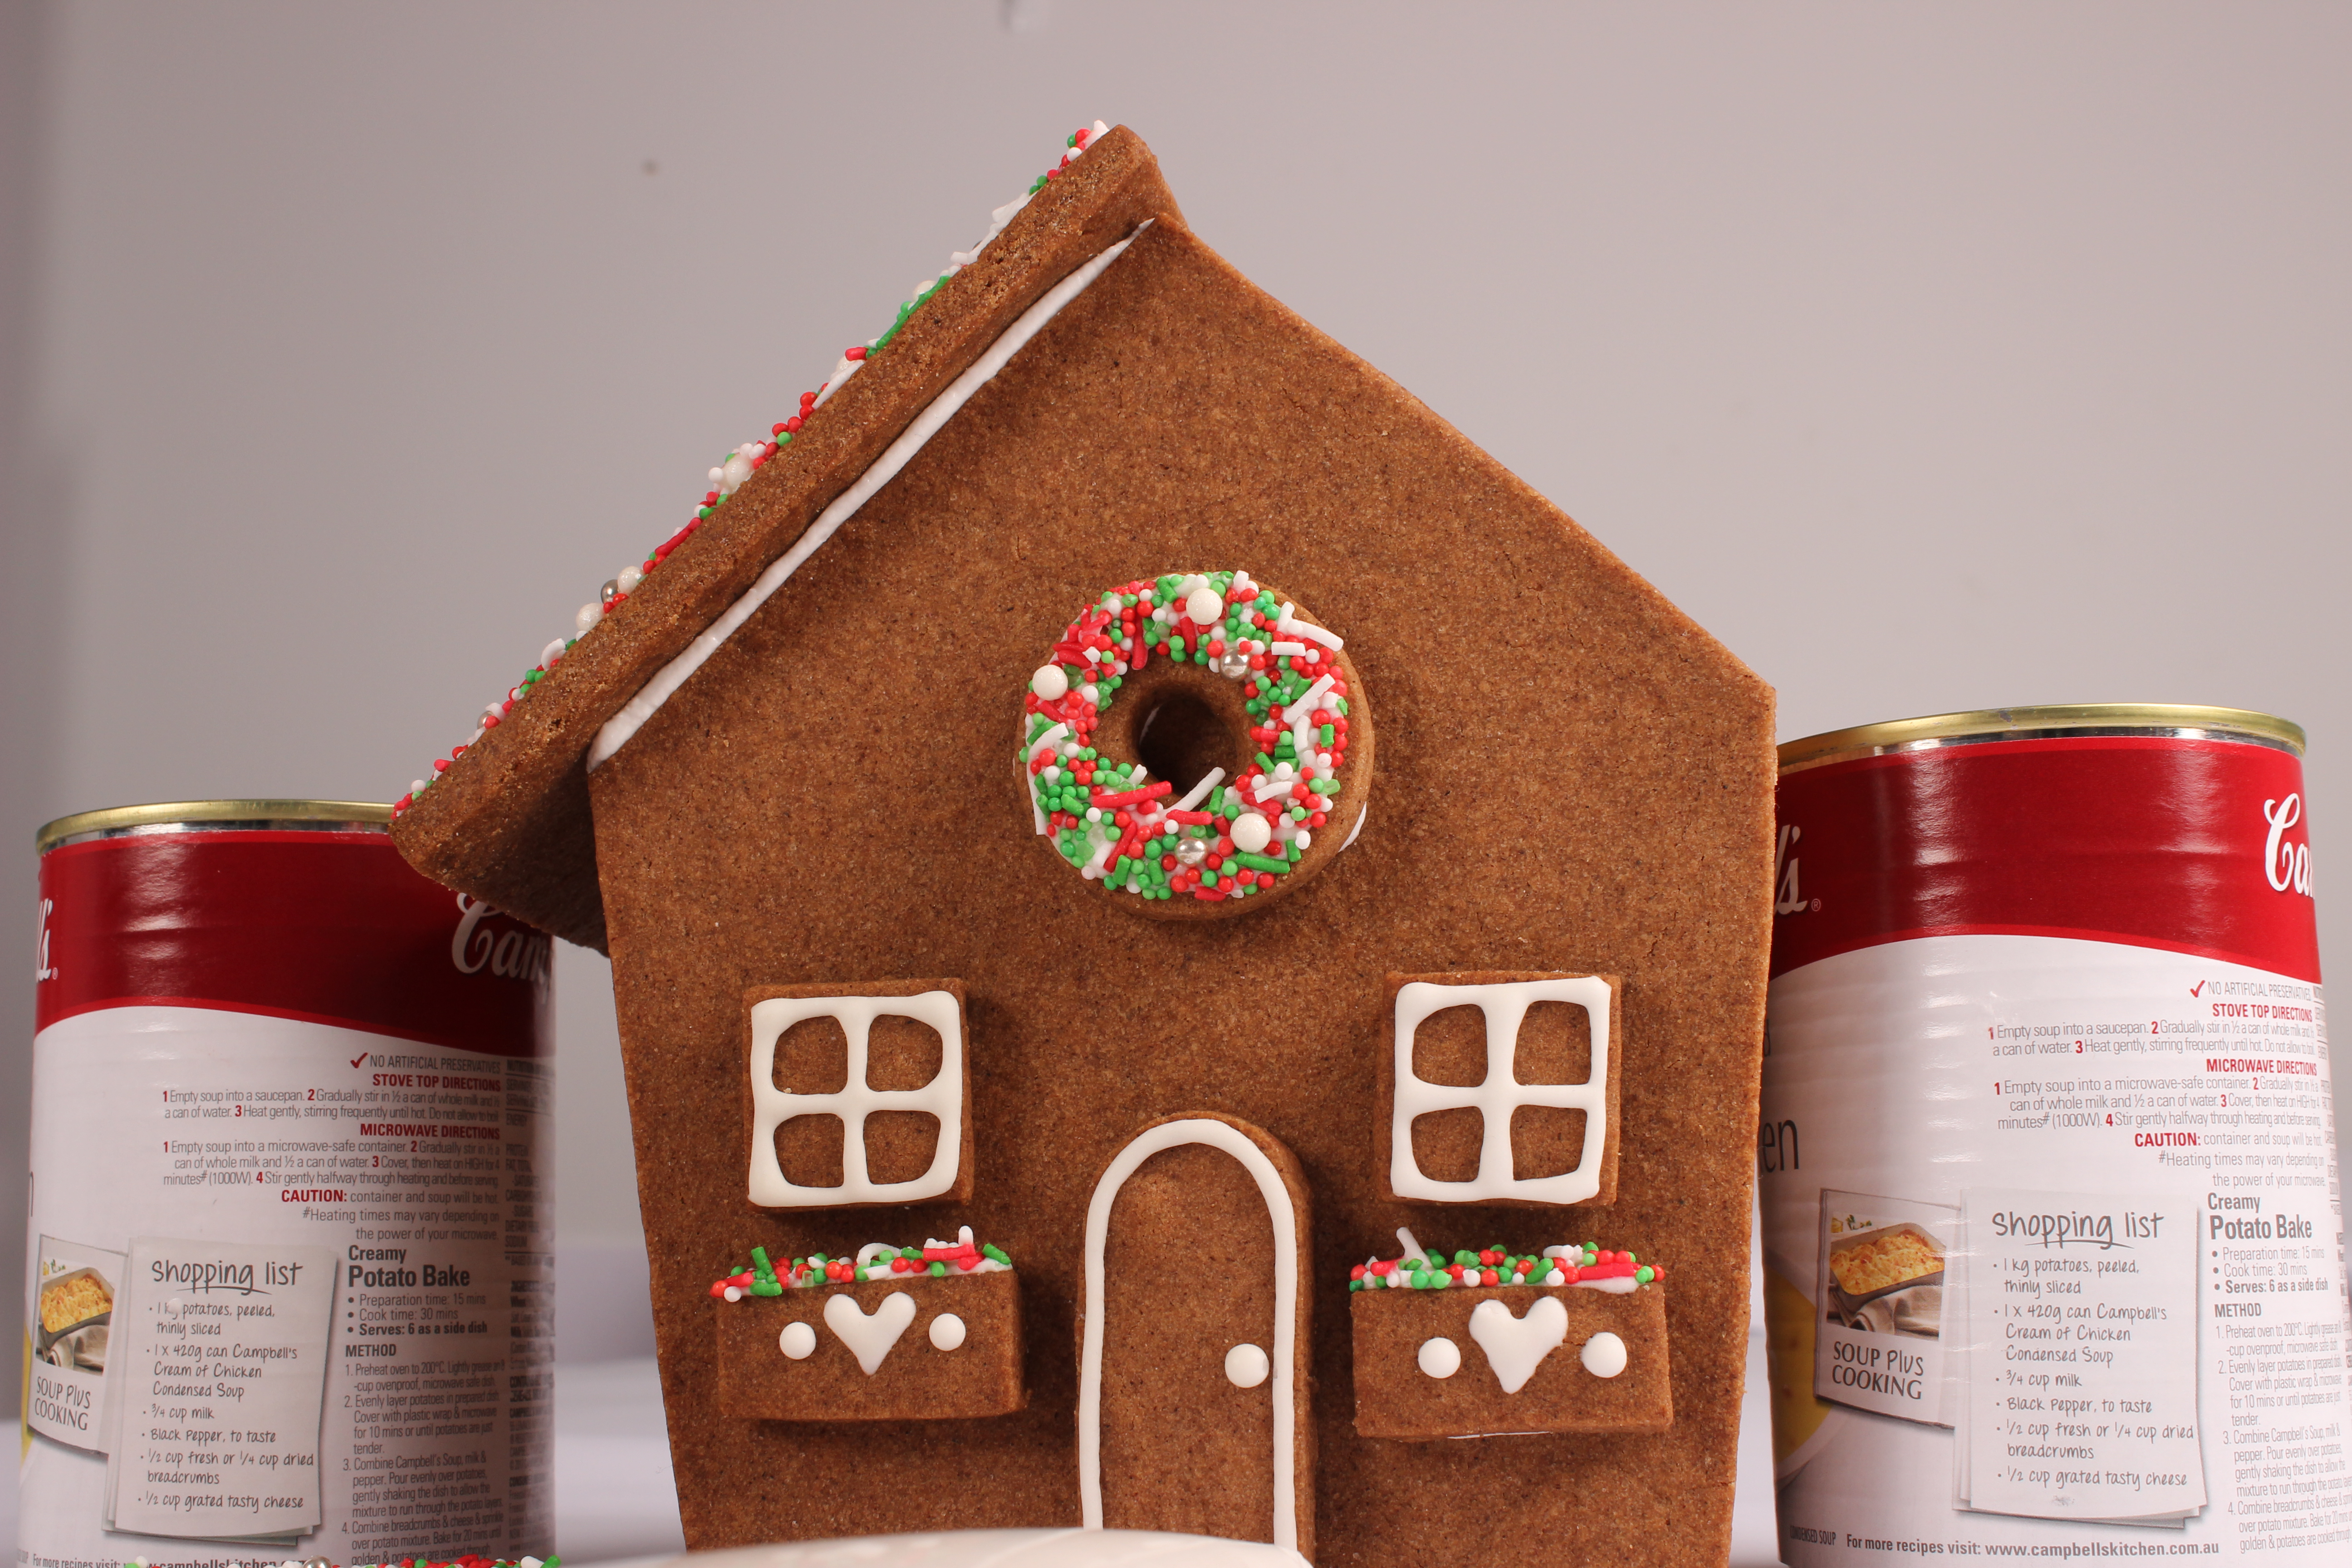
We suggest decorating the roof prior to house assembly. Use the thin consistency royal icing to pipe decorative lines and then attached sprinkles and allow to set dry. Accessory details, like windows, doors, planter boxes, can be assembled pre or post house assembly.