Gingerbread Snow Globes
Posted by Roberts Edible Craft on 14th Sep 2025
There is something magical about snow globes, the tiny winter scenes frozen in time, the gentle swirl of snowflakes with a shake. Now imagine capturing that charm in a delicious, edible form!
This gingerbread snow globe is part festive treat, part edible art.
Made with our signature best selling spiced Gingerbread cookie mix, whether you're baking for a holiday party or looking for a creative family project, this recipe will add a touch of wonder to your celebration season. Let's bring the magic to life—one snowy bite at a time.
Our Gingerbread mix is what we call a No Spread Mix, meaning when you cut out your pieces and bake them, they will not spread or change shape. This means you can create this simple project with confidence, knowing your snow domes and bases will join together each and every time.
So gather your supplies, and follow along with us to create your Christmas Snowglobe scene. You can also download our FREE recipe sheet to print or save for easy reference. You can find it here Recipe Sheet - Gingerbread Snow Globes
Ingredients:
- 500g Roberts Edible Craft Gingerbread Mix
- 150g Melted Butter
- 4 Tsp Water
- 6 Tbs Golden Syrup
Tools & Equipment:
- Roberts Edible Craft 6mm White Thickness Guides
- Rolling Pin
- Baking Paper
- 8cm Round Cookie cutter
- Royal Icing White - Thick & Thin consistency.
- Royal Icing Coloured
- Roberts Edible Craft Winter White Sprinkle Mix
- Piping bags and nozzles
- Cake Dowel or Lollypop Stick
A 500g Recipe will make approximately 10 Snow Globes
Step 1. Prepare your gingerbread dough according to the instructions on our pack.


Step 2. Roll out the dough between two sheets of baking paper. Aim for a minimum of 6mm thickness to support the channel you will create in Step 4. Our Roberts Edible Craft Thickness Guides come in a set of 3 different thicknesses and the white 6 mm guides are perfect for this project. You lay the spaces either side of your dough, place your rolling pin on top, and start to roll. The guides will enable you to continue to roll to the right thickness and prevent you from going too thin, or getting uneven spots. You can find them here. 
Step 3. Cut out circles, using an 8cm round cookie cutter.
Step 4. Working in pairs, cut 2 cm off one side of one circle. This will become the dome section of the Snow Globe and will sit upright on the base. With its pair (the base), create a 1 cm channel indent through the middle of the circle. You can use a lollypop stick or cake dowel to do this. This is essentially the cavity the dome will sit in, to create the finished snow globe effect.

Step 5. Bake your pieces after this step and allow them to fully cool before your start decorating.
Step 6. Prepare your royal icing and place into piping bags. Ideally you want one piping bag with a small nozzle for creating outlines, another piping bag with a larger nozzle for flooding (ie filling in the larger areas) and different bags with your coloured royal icing.
Step 7. Outline your snow domes & bases. Allow to completely dry. This step creates a barrier for your royal icing. When you fill in the sections inside the outlines with more royal icing, the outlines created here, will stop the icing running over the edges. You can skip this step if you like. We suggest it, to create a cleaner crisper edge like a professional. Just remember to leave the channel void of icing at this step. You will work on the channel in Step 10.
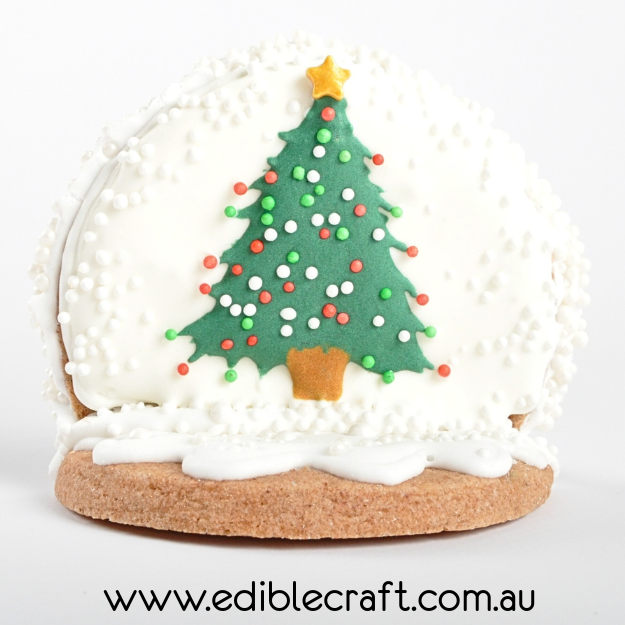
Step 8. Pipe a generous layer of royal icing to cover the top edge of you snow domes and dip into a bowl of sprinkles.


Step 9. Fill in the outlined areas with the flooding icing. You can add more sprinkles to the base and dome for a snowy effect. Pipe on your coloured royal icing decorations as the last step and allow to dry.

Step 10. To assemble, pipe a generous line of royal icing into the channel on your base piece, and stand your dome piece upright into it. Hold until the icing sets and it can stay upright on its own. Allow to fully dry.
If you are creating your snow globes as a piece of art or decoration, the gingerbread creations will last for a long time. If you are however creating them to eat, we do suggest eating within a two week period. This will ensure they taste at their best.
